
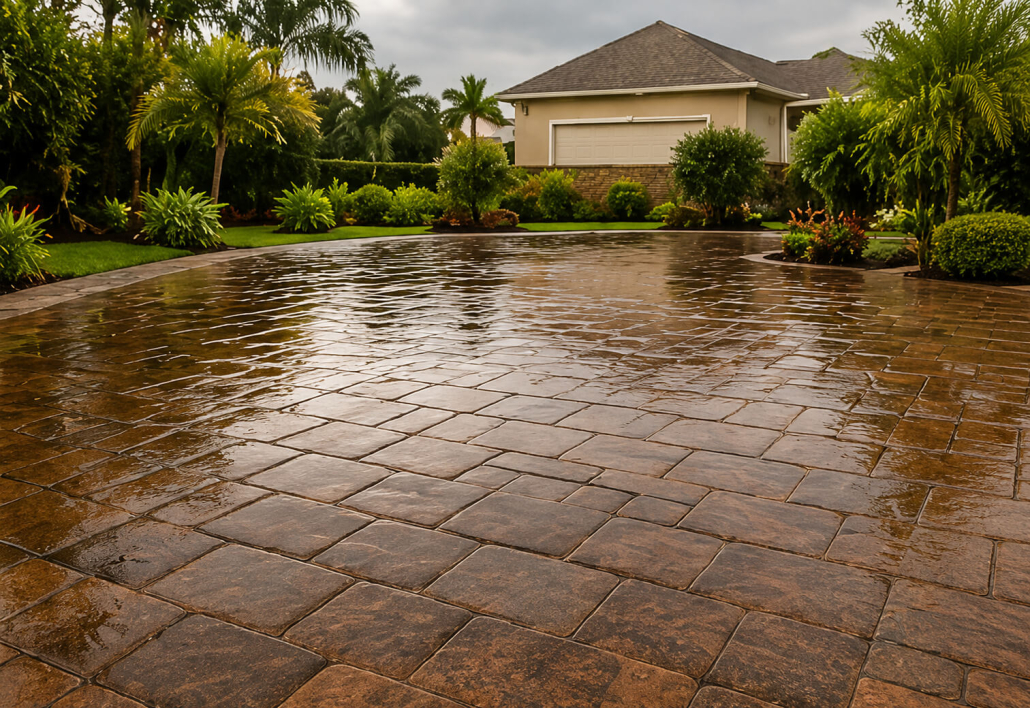
You look at the driveway after a summer of storms and notice blotchy color, dull patches, and sand washed out from the joints. The surface is slippery near the pool and a white haze appears in places. That’s the symptom. Fixing it starts with timing.
1. High humidity and rain—why October gives sealers a real chance
What it is: Tampa Bay’s wet season runs roughly June through September. Humidity often sits above 70 percent and afternoon downpours are common. That keeps moisture trapped under the paver surface and in joint sand.
How you recognise it: sealer that looks tacky after 24 hours, white haze or blushing, and areas where the sealer peeled within weeks. You might also see efflorescence—white, chalky salts—on the paver face.
Fixing it: wait for a dry stretch of at least 48 hours with daytime highs between about 70° and 90°F and lower humidity if possible. October in Tampa Bay often provides those windows: fewer afternoon storms, lower daily humidity, and milder sun. Practically, that means plan to book a reseal for a week with a 48-hour rain-free forecast. Professional-grade water-based sealers cure reliably under those conditions; they’re also the sealants Paver Rescue uses to resist UV fading and inhibit mold and algae.
2. Worn joint sand—what it looks like and why you can check it
What it is: joint sand—usually coarse masonry sand or polymeric sand—locks the pavers and resists weed growth. In heavy rain it washes out, especially around edges where runoff concentrates.
How you recognise it: press into a joint with your thumbnail. If the sand is down a quarter-inch or deeper and you can see the bedding or base, the joints need resanding. You may also feel movement when you step on an edge or near a driveway seam.
Fixing it: the simple check is DIY. Clean loose debris, add polymeric sand or coarse joint sand, then compact it with a plate compactor or a rubber mallet and broom. For wide joints or hardened polymeric sand, the installer brushes in and activates the sand with water in a controlled amount so it bonds. Never seal over visibly empty joints—sealer will trap the gap and make future repairs messier.
3. Surface staining and organic growth—clean first, then judge sealing
What it is: algae, mildew, tannin stains from nearby trees, tire marks and oil spots are all common in coastal-humid yards. Salt spray near the coast causes faster salt staining and efflorescence on brick pavers.
How you recognise it: green or black slick patches near shaded areas, darker rings where cars park, and white crystalline deposits on paver faces. A damp, musty smell around the patio after rain is another sign.
Fixing it: cleaning is step one. A deep pressure wash with a rotating surface cleaner, followed by a mild detergent or efflorescence cleaner where needed, removes organics and salts. Light stains can be brushed off; stubborn oil or tire marks may need a degreaser or a poultice. After cleaning, allow the surface to dry 48–72 hours in Florida’s humidity before sealer goes on. If you prefer a pro, Paver Rescue’s paver cleaning and pressure washing page shows their process for Wesley Chapel customers and similar Tampa Bay conditions: paver cleaning and pressure washing in Wesley Chapel.
4. Sealer type and coat count—choose the right film for Florida
What it is: sealers come as film-forming (wet-look or satin) or penetrating. Film-forming water-based sealers add a protective layer and enhance color; penetrating sealers soak in and don’t change appearance much.
How you recognise problems: a single thin coat looks good when wet but turns blotchy as it dries. Heavy traffic areas fade sooner. If the sealer peels or looks uneven, it was either applied too thin, over damp pavers, or with the wrong product type.
Fixing it: expect at least two coats for paver driveways in Tampa Bay—often 2–3 coats where traffic is heavy. Film-forming, professional-grade water-based sealers with UV inhibitors suit Florida because they resist sun bleaching and block stains. Wait 60–90 days to seal any recent installation to let efflorescence release and the base settle. Typical recoat intervals for driveways are every 3–5 years, sooner on high-traffic or coastal jobs.
5. Edge and base problems—what shifting or sinking tells you
What it is: when the edge restraint fails or the base compaction is poor, pavers shift, settle, or rock. In Tampa Bay, heavy summer storms and saturated soil make these failures more common around lawn edges and driveways without proper drainage.
How you recognise it: gaps at the edge, visible movement when you step on a paver, and low spots that hold water after rain. Look for separation at seams, and sinking at catch basins or near downspouts.
Fixing it: these are pro repairs. Fixing requires removing the affected pavers, replacing or resetting the edge restraint (plastic or concrete edge, anchors), regrading and compacting a new base—typically 4–6 inches of compacted concrete sand and 1–2 inches of bedding sand for driveways—then reinstalling and resanding. In coastal or flood-prone yards plan for better drainage and possibly a stabilizing geotextile under the base. This is not a DIY weekend if vehicles are involved.
6. Efflorescence and salt deposits—how to tell when to delay sealing
What it is: efflorescence is salt left behind when water evaporates through the paver. It shows as white, powdery streaks or crusts. Salt will also leach from concrete bases and adjacent walls.
How you recognise it: white haze or flaky deposits that brush off but return after a rain or cleaning. On darker pavers it’s very visible and it can give a false impression that the sealer failed.
Fixing it: remove efflorescence with a chemical cleaner designed for pavers, then rinse and let the surface dry completely. Wait longer—sometimes 60–90 days—after cleaning for salts to stop migrating. Avoid sealing immediately after heavy rains or after pressure washing if the base is still wet. October offers a better chance that salts will stop cycling with regular rainfall.
7. Mechanical damage and large repairs—when you need a contractor
What it is: cracked pavers, broken edge restraints, or sections with collapsed base under vehicle loads. These problems often follow sinkholes under the slab or tree roots lifting the field.
How you recognise it: visibly cracked units, wide gaps, a section that won’t accept compacting, or uneven ride when driving over a seam. If the base material is exposed or the bedding sand is washed away, you need professional restoration.
Fixing it: a contractor removes the damaged pavers, rebuilds the base—often replacing 4–8 inches of base material—compacts properly, and relays the pavers with new joint sand. This restores load-bearing capacity and prevents the sealer from simply masking a structural issue. For pool decks and patios in Land O’ Lakes with travertine or other sensitive stone, see the specific restoration steps shown on the pool deck restoration page.
Urgency: what you can wait on, what you should act on
Can wait: cosmetic fading, light surface staining, and routine reseal scheduling can usually wait a few weeks until a good dry window in October. Resealing outside the ideal window lowers longevity but won’t usually cause collapse.
Act now: moving edges, sunken areas, sections that hold water, or large sections of missing joint sand. These indicate base or edge-failure that will worsen with continued vehicle use. If you see cracking under load or drainage that channels under the pavers, stop using that area until repaired.
Immediate shut-offs: not applicable in most paver jobs, but if surface water is diverting from gutters or downspouts into the paved area, redirect the flow temporarily with a hose or sandbags to keep the base from saturating further.
When to call Paver Rescue
Try these free checks first: thumb the joint sand, brush or wash small organic stains, and wait for a 48–72 hour dry window before sealing. If joints are down a quarter-inch, edges rock underfoot, or the base stays wet after several days, escalate.
Call a contractor when repairs require base replacement, edge-restraint work, or when the job needs controlled cleaning and multi-coat sealing in a narrow dry window. For homeowners in Brandon and surrounding Tampa Bay cities planning sealing or new installs, Paver Rescue offers free estimates by phone at 813-391-6159 or by email at lucas@paverrescuellc.com. For new patios or pool decks in Brandon, see the paver installation page for details on materials and process: paver installation for patios and pool decks in Brandon. If your driveway is in need of reseal or restoration in Tampa specifically, the restoration and repair page describes common driveway fixes: paver restoration and repair services in Tampa.
Local timing note: October in Tampa Bay typically yields multiple 3–5 day windows with lower humidity and fewer afternoon storms—use those stretches. Plan for a one-day job on a typical 500–800 sq ft driveway for cleaning, resanding, and two coats of sealer; larger driveways or repairs add time. Expect routine resealing every 3–5 years; coastal or high-traffic drives may need it sooner. Paver Rescue LLC is at 10810 Carrollwood Dr., Tampa, FL 33618 and accepts calls at 813-391-6159 for a free estimate.


Leave a Reply
Want to join the discussion?Feel free to contribute!