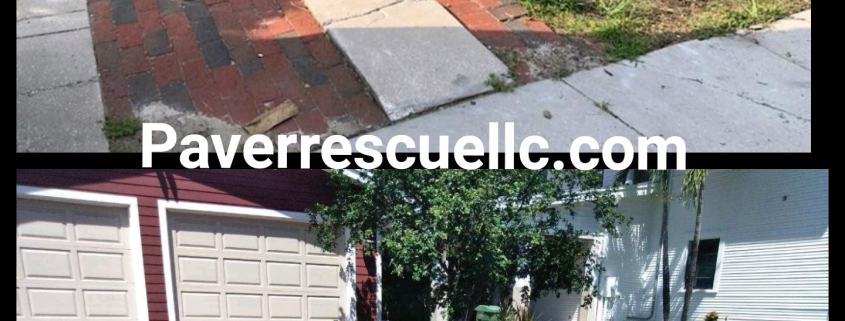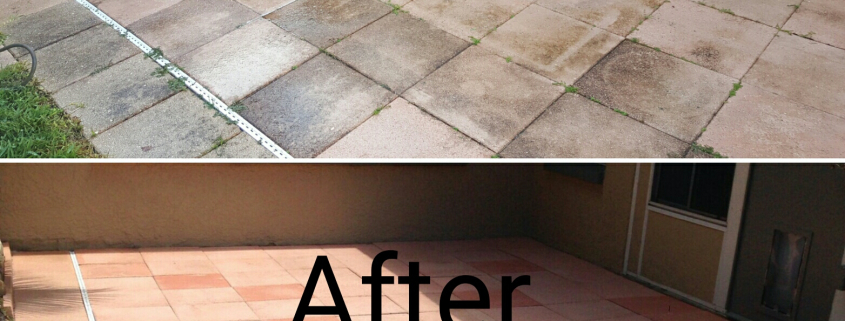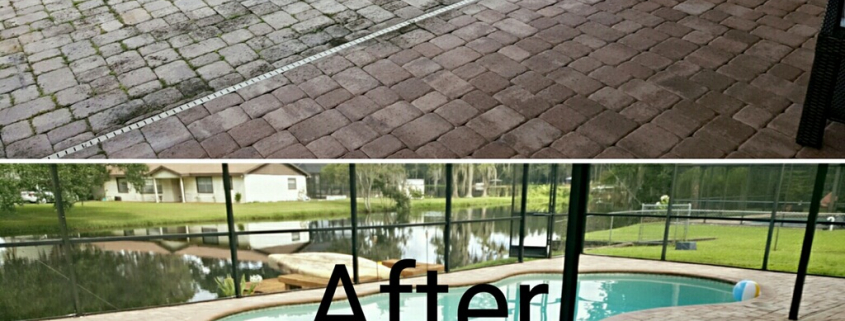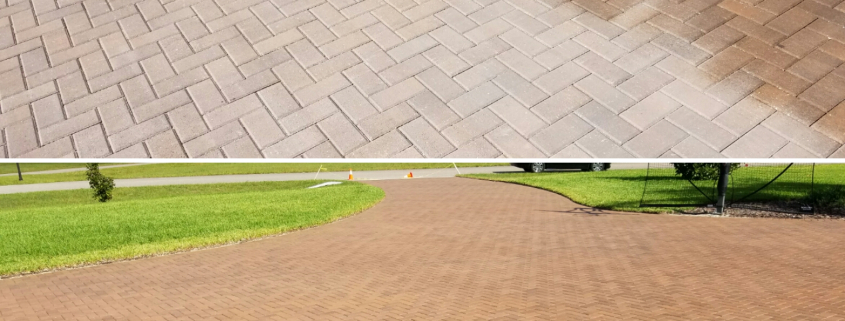
Before and after paver driveway cleaning and resealing by Paver Rescue LLC in Tampa Bay FL

ARTICLE

How a Paver Driveway in Clearwater Should Be Cleaned Before It Can Be Properly Resealed

A step-by-step look at how professionals prep a Clearwater paver driveway for resealing, and why the cleaning stage determines whether the sealer lasts one season or seven years.

Most homeowners who call about resealing a paver driveway assume the job is mostly about the sealer itself. In reality, the sealer is the easy part. What determines whether a fresh coat lasts seven years or peels off in one rainy season is what happens before the sealer ever comes out of the bucket. In Clearwater, where salt air, summer humidity, and afternoon thunderstorms all conspire against coatings, the cleaning and prep sequence is the entire ballgame.

Why Prep Matters More Than the Sealer You Choose

A paver sealer is a bonding product. It has to key into a clean, dry, mineral-free surface. If it goes down over dust, efflorescence, mildew, or trapped moisture, the bond fails at the interface between the paver and the coating — not because the sealer was cheap, but because it never touched the paver in the first place.

This is why two contractors can use the exact same sealer on two identical driveways and get wildly different results. The one who spent a full day on prep gets a driveway that still looks sharp at year five. The one who pressure washed on Monday and sealed on Tuesday morning gets a callback in six months.

Step One: Diagnose Before You Clean

Before any water hits the driveway, the surface needs an honest inspection. In the Clearwater area, it is common to look for four things: efflorescence (the chalky white haze that migrates up through concrete pavers), organic staining from oak tannins and mildew, rust from irrigation water, and any prior sealer that may still be present.

Each of these requires a different chemistry. Efflorescence needs a mild acidic cleaner formulated for pavers. Organics need a sodium hypochlorite or percarbonate treatment. Old solvent-based sealer has to be stripped, not just washed. Skipping the diagnosis is how contractors end up sealing white haze permanently into the surface.

Step Two: Efflorescence Treatment

Efflorescence is the single most misunderstood problem on Florida paver driveways. It is not dirt. It is calcium hydroxide and other soluble salts working their way to the surface as moisture moves through the pavers. Pressure washing alone will not remove it, and sealing over it traps it — often creating a permanent milky look under the coating.

A proper efflorescence treatment uses a buffered acid cleaner, applied wet-on-wet, dwelled for a controlled time, then neutralized and rinsed. On a coastal Clearwater driveway that also sees salt spray, this step doubles as a salt flush, which matters because chloride residue interferes with sealer adhesion the same way efflorescence does.

Step Three: Pressure Washing Done Correctly

Pressure washing a paver driveway is not the same job as washing a concrete slab. Pavers have joints filled with polymeric or standard sand, and the wrong tip at the wrong distance blows those joints out in seconds. The correct approach uses a surface cleaner attachment at a controlled pressure, held at a consistent height, moved at a steady pace so the surface comes out uniform rather than striped.

Edges, borders, and areas around drains get finished with a wand, but again at a distance and angle that lifts contamination without excavating the joints. Any sand that does get displaced has to be accounted for in the re-sanding step later. This is technique work, and it is a large part of what a homeowner is paying for.

Step Four: Joint Inspection and Repair

Once the surface is clean and the sand is dry enough to evaluate, the joints get inspected. Low joints, washed-out joints, ant tunnels, and areas where pavers have settled all get addressed before sealer goes down. Fresh joint sand — typically a polymeric product suited to Florida rain volumes — is swept in, compacted, and topped off until the joints sit roughly an eighth of an inch below the paver chamfer.

Sealing over deficient joints locks in the deficiency. The sealer stiffens whatever sand is there, so if the joint is low or hollow, it stays that way for years. Getting this right during prep is far cheaper than fixing it later.

Step Five: Dry Time in Florida Humidity

This is the step that separates careful contractors from busy ones. A paver driveway that has been washed and treated holds moisture deep in the paver body, not just on the surface. In Clearwater’s summer humidity, with dew points in the mid-70s and afternoon storms almost daily, that moisture can take 24 to 72 hours to release, even when the top looks bone dry.

Sealing too early traps that moisture. The result is blushing (a hazy white cast under the sealer), pinholing, or delamination within weeks. A professional will use a moisture meter, watch the weather window, and often schedule the seal coat two or three days after the wash — not the next morning. In the rainy season, that window sometimes has to be rebuilt around a passing front.

Why the Prep Step Costs What It Does

When homeowners search for paver sealing near me and compare quotes, the spread is often striking. The lower numbers almost always reflect a compressed prep schedule: a quick wash, a same-day seal, no efflorescence treatment, no joint work. The higher numbers reflect a full multi-day prep sequence with the chemistry, equipment, and dry time the Florida climate actually requires.

The sealer itself is a small line item. Labor, chemicals, and the calendar days a driveway ties up on a crew’s schedule are the real cost, and they are what buys longevity.

Your Next Step

If your Clearwater paver driveway is fading, hazing, or overdue for resealing, start with an on-site assessment rather than a phone quote. A walk-through lets a contractor identify efflorescence, joint condition, prior sealer type, and drainage issues — the four variables that decide how your project should actually be scoped. Get that assessment in writing, ask specifically what the prep sequence includes, and use it to compare bids on equal footing. That single step tends to save homeowners far more than shopping on price alone.

Paver base repair with plate compactor on Tampa Bay driveway, exposing drainage issues under pavers

ARTICLE

How Standing Water After a Storm Reveals the Real Drainage Problem Under Your Pavers

Pooling water on your pavers after a Florida storm is rarely just a surface issue. Here’s what it usually signals about the sub-base and how contractors diagnose it.

After a hard July downpour in Wesley Chapel, most homeowners walk outside expecting the water to be gone within an hour or two. When puddles are still sitting on the driveway or pool deck the next morning, it’s tempting to write it off as a rough afternoon of weather. In Florida, that standing water is almost always telling you something more important: the structure beneath your pavers isn’t draining the way it was built to.

What Standing Water Actually Means

A properly installed paver system is designed to shed water in two directions. Some of it runs off the surface toward a lawn, drain, or swale. The rest passes through the joints, into the bedding sand, and then through the compacted aggregate base to the soil below. When water pools and lingers, one of those pathways has failed.

In Pasco County, where sandy topsoil sits over pockets of clay and hardpan, the failure is often below the surface long before it shows up on top. The pavers are simply the messenger.

Why the Sub-Base Is the Real Story

The sub-base — typically four to six inches of compacted crushed stone under residential pavers, more under a driveway — is the load-bearing skeleton of the entire installation. It carries vehicle weight, resists shifting, and channels water down and away.

When that layer settles unevenly, gets contaminated with fines washed in from surrounding soil, or was never compacted to the right density in the first place, it stops functioning as a drainage layer. Water hits it, cannot pass through, and backs up to the surface. The pavers on top look fine. The system underneath is not.

Florida’s Rainy Season Accelerates the Damage

From June through September, Tampa Bay routinely sees rain events that dump two to four inches in under an hour. A healthy paver system handles that. A compromised one absorbs the water into the bedding sand, holds it there, and lets it work on the joints, the edges, and the sub-base every time the sun heats things back up.

That freeze-thaw cycle homeowners in northern states worry about doesn’t apply here, but Florida has its own version: saturate, bake, saturate, bake. Over a single summer, that cycle can wash out joint sand, breed efflorescence, feed weed growth between stones, and quietly erode the base under the low spots. By the time a homeowner calls for paver repair, the visible dip is often just the tip of a much larger void.

What a Contractor Actually Looks For

When we’re called out to a home in Lutz or Land O Lakes after a storm, the standing water itself is only the starting point. The real diagnosis happens through a series of specific checks.

We map where the water pools relative to the original slope. A paver surface should carry roughly an eighth-inch of fall per foot toward its drainage point. If the low spot is in the middle of a run rather than at the intended outlet, we know settlement has occurred. We probe the joints to see how deep the polymeric sand still reaches, and we lift a test paver or two in the worst area to inspect the bedding sand and the base directly. Wet, muddy, or displaced bedding sand is a clear indicator that water is being trapped instead of drained.

Common Causes Beneath the Surface

A handful of issues account for most of what we find under failing installations in the Tampa Bay area. The first is inadequate base depth — installations done quickly or on a tight budget often skip the extra compacted aggregate a Florida driveway needs. The second is poor edge restraint, which lets the base migrate outward under load until the center sinks.

The third, and probably the most common on homes more than ten years old, is base contamination. Over time, groundwater and irrigation push fine soil particles up into the crushed stone. What was once a free-draining layer turns into something closer to concrete, and water has nowhere to go. No amount of resealing the surface will fix that.

Why Cosmetic Fixes Make the Problem Worse

It’s common to see homeowners — or unfortunately, some contractors — respond to standing water by adding more joint sand, sealing over the top, or leveling individual pavers by hand. Those steps address the symptom for a season at most.

Sealing a paver system that isn’t draining actually traps moisture in the bedding sand, which speeds up efflorescence, encourages mold under the stones, and makes the next repair more expensive. A good paver repair starts with pulling up the affected section, diagnosing the base, correcting the drainage path, and rebuilding the layers in the right order. Done properly, the reset section will outlast the surrounding original work.

Your Practical Next Step

After the next significant storm, walk your driveway, patio, and pool deck about two hours after the rain stops. Note any spots still holding water, any joints where sand has washed out, and any pavers that rock slightly when you step on the edge. Take a few photos from the same angle each time so you can track whether the low spots are growing.

If you’re seeing repeat pooling in the same areas through the summer, that’s the point to bring in a contractor who will actually lift a paver and inspect the base rather than quote you a surface reseal. Catching a drainage failure early — while it’s still confined to a small section — is the difference between a targeted repair and rebuilding the entire installation a few years down the road.

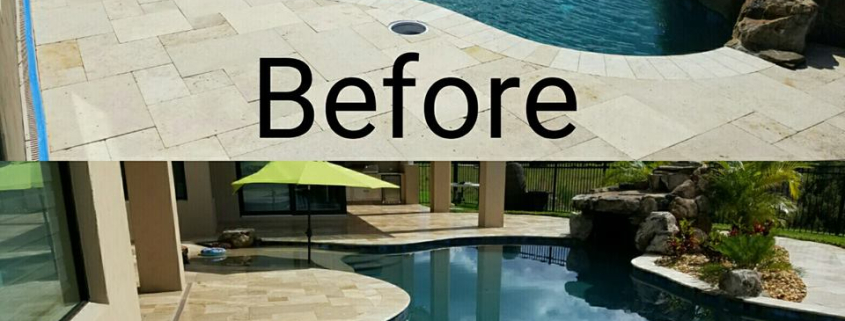
Before and after paver restoration on a Florida pool deck, showing renewed color and sealed surface — Land O Lakes paver restoration

ARTICLE

What a Paver Restoration in Land O Lakes Actually Involves, Start to Finish

A step-by-step look at what a full paver restoration in Land O Lakes really includes, from deep cleaning and efflorescence treatment to joint sanding and sealing.

If your paver driveway, patio, or pool deck in Land O Lakes has faded, shifted, or grown a green film along the joints, a fresh coat of sealer alone will not turn back the clock. A true restoration is a sequence of steps, each one preparing the surface for the next. Here is what that process actually looks like, and what a well-written proposal from a contractor should include.

Why a Reseal Alone Is Not a Restoration

Sealer is a finishing product. It locks in whatever condition the pavers are already in, including embedded dirt, biological growth, hazy efflorescence, and empty joints. Applied over a neglected surface, it can trap moisture underneath and cause a milky white blush that is difficult to reverse in Florida’s humidity.

A restoration, by contrast, addresses the surface, the joints, and the substrate before any sealer is opened. On older Land O Lakes installations that have gone five or more years without maintenance, this full sequence is usually what the pavers actually need.

Step 1: Inspection and Repair Planning

The process starts with a walk of the surface to identify sunken pavers, hollow spots, cracked or chipped units, oil stains, rust from irrigation, and areas where the base has washed out. Pool decks get extra attention around drains, coping, and any spots where salt or chlorine exposure has etched the stone.

The inspection also determines whether individual pavers need to be lifted and relaid, whether a low area needs the base rebuilt, and whether a section has drainage problems that will undermine the finished work. A contractor who skips this step and quotes a flat per-square-foot price for “restoration” is quoting a cleaning, not a restoration.

Step 2: Deep Cleaning and Stain Treatment

Once repairs are scoped, the surface is cleaned. This is more than a rinse. A surface cleaner attachment on a pressure washer is used to lift ground-in dirt evenly, while spot treatments handle organic growth, rust, tire marks, and grease. Rushing this step or using too much pressure can etch the paver face and blow out what little joint sand remains, so technique matters.

In Land O Lakes, where oak canopy and afternoon storms feed algae and mildew year-round, a biocide treatment is typically applied so the growth does not return within weeks. For homeowners considering a similar approach on a lanai or pool surround, our overview of pool deck paver sealing and repair work covers the added considerations around water features.

Step 3: Efflorescence Treatment

Efflorescence is the chalky white haze that appears when moisture pulls mineral salts to the paver surface. It is extremely common on Florida installations because our water table is high, our rainy season is intense, and concrete pavers continue to cure and release calcium for years after installation.

A proper restoration includes a dedicated efflorescence remover, applied after the initial cleaning, that dissolves those mineral deposits chemically. Skipping this step is one of the most common reasons a “restored” driveway looks cloudy or streaky within a month of sealing. The treated surface is then neutralized and rinsed thoroughly before drying.

Step 4: Repairs, Releveling, and Edge Restraint Checks

With the surface clean, damaged pavers are swapped out, sunken sections are lifted and reset on fresh bedding sand, and the polymeric or joint sand that remains is removed from the joints. Edge restraints along driveway borders and patio perimeters are inspected, because a failed edge will let the field of pavers migrate outward no matter how carefully the interior is sealed.

This is also the stage where a contractor addresses the underlying reasons a section failed in the first place. If you are weighing a full rebuild instead of a restoration on a heavily damaged driveway, our page on paver restoration and repair services across the Tampa area outlines when each approach makes sense.

Step 5: Joint Re-Sanding

Once the surface is dry, the joints between pavers are refilled. Most restorations in the Land O Lakes and Lutz area use polymeric sand, which locks together when activated with a fine mist of water. Properly filled joints stabilize the pavers, discourage weeds and ants, and give the sealer a clean edge to bond against.

Joint sand has to be swept in carefully, compacted, topped off, and cleaned from paver faces before activation. Any sand left on the surface will cure into a haze that is visible under the sealer. If your project is more about routine upkeep than full restoration, the process outlined on our paver cleaning and sealing page for Lutz covers the lighter-touch version of this work.

Step 6: Sealing for Florida Conditions

Only now does sealer go down. Product selection matters here. A water-based sealer with a breathable film handles Florida humidity better than a heavy solvent-based coating that can trap moisture and turn white. Finish choice, whether matte, semi-gloss, or wet look, is a matter of preference, but the application method and cure time are dictated by weather.

Good crews watch the radar closely during the rainy season and will reschedule rather than seal ahead of a storm that could hit before the product sets. Two thin coats generally outperform one heavy coat, and joint sand stabilization improves when the sealer wicks slightly into the sand rather than pooling on top.

What to Ask Before You Sign a Proposal

A restoration proposal for a Land O Lakes home should specify the cleaning method, whether efflorescence treatment is included, how joints will be refilled and with what product, which sealer will be used, and how weather delays are handled. If any of those items are missing, ask for them in writing before work begins.

Walk your property with a notebook, photograph the problem areas, and get at least two detailed quotes from licensed paver professionals. Comparing scopes side by side is the fastest way to tell the difference between a true restoration and a surface-level reseal that will leave you disappointed by the next rainy season.

Before and after pool deck paver cleaning on a Tampa Bay home, showing algae and mold removal on unsealed pavers beside a backyard pool.

ARTICLE

How to Tell If Your Wesley Chapel Pool Deck Pavers Need Cleaning or Full Restoration

A condition-by-condition guide for Wesley Chapel homeowners to tell whether their pool deck pavers need a routine cleaning and reseal or a full restoration.

From a lounge chair on a July afternoon, a tired pool deck can look like one big problem. Dark blotches, chalky white haze, and rough patches all blur together, and it is easy to assume the whole surface needs to be torn out and redone. In most cases it does not. The trick is learning to read what you are actually seeing, because black algae, efflorescence, and true surface pitting each call for a very different response. Here is how to sort them out on a Wesley Chapel pool deck before you spend money on the wrong service.

Start With a Dry, Close-Up Look

Diagnose your deck when it is dry and the sun is low, not right after a rain or a pool splash. Water darkens everything and hides the difference between a stain that sits on top of the paver and damage that has worked its way into the stone or concrete. Morning or late afternoon light also shows surface texture that midday glare washes out.

Walk the entire deck, including the shaded strip against the house and the coping around the waterline. Bring a soft brush and a spray bottle. If a mark lifts with a light scrub and plain water, you are almost certainly looking at a cleaning issue, not a structural one.

Black Algae and Mildew: Usually a Cleaning Job

Wesley Chapel summers are long, humid, and shaded by oak canopies in many neighborhoods. That combination feeds black algae, mildew, and the gray-green biofilm that creeps across pavers in the shoulder seasons. It typically shows up as irregular dark spots or a uniform dinginess in low-traffic areas, and it feels slightly slick underfoot when wet.

If the paver underneath is still solid, joints are intact, and the color returns after a test scrub, a professional cleaning followed by a fresh sealer coat is usually enough. The sealer is the part homeowners skip, and it is the part that keeps the algae from returning within a season.

Efflorescence: A Chemistry Problem, Not a Dirt Problem

Efflorescence is the chalky white film that appears on concrete pavers, usually within the first year or two after installation and again after long rainy stretches. It is caused by soluble salts inside the paver migrating to the surface as moisture evaporates. People often mistake it for hard water stains or faded color and attack it with pressure washing, which does almost nothing.

Efflorescence needs a mild acidic cleaner formulated for pavers, applied carefully and neutralized. Once removed, the surface should be resealed with a breathable product that lets remaining moisture escape. Sealing over active efflorescence with the wrong product can trap the haze permanently, which is one of the more common reasons homeowners end up needing a full paver restoration rather than a routine cleaning.

Surface Pitting, Spalling, and Chipped Edges

Now we move into restoration territory. Pitting looks like small craters in the paver face. Spalling is when the top layer flakes off, exposing a rougher, lighter interior. Chipped or crumbling edges around the pool coping or step nosings are related failures. These are structural, not cosmetic, and no amount of cleaning will bring them back.

On travertine decks, pitting can be natural to the stone and is often filled at installation. When those fills pop out over time, they need to be refilled, honed, and sealed. On concrete pavers, widespread spalling usually means the pavers themselves are at the end of their useful life in the affected area and need to be swapped out with matching units.

Joint Sand, Settling, and Movement

A pool deck that looks stained may actually be failing at the joints. When polymeric sand washes out — a common issue after Tampa Bay’s summer downpours — pavers begin to shift, weeds and ants move in, and water gets underneath the base. That trapped moisture is what accelerates the efflorescence and algae problems you see on the surface.

Check for pavers that rock underfoot, low spots that hold water for more than a few minutes after rain, and gaps wider than the width of a nickel. If you see any of these, cleaning alone will not solve the problem. The deck needs re-leveling, fresh joint sand, and a proper reseal. Homeowners with travertine pool decks in the Wesley Chapel area (live Aug 23) should pay particular attention to coping joints, where movement tends to start.

The Sealer Itself Can Be the Problem

Old sealer that has yellowed, clouded, or turned white in patches is another condition that looks like dirt but is not. This usually happens when a solvent-based sealer was applied too thick, applied over trapped moisture, or simply reached the end of its lifespan under Florida UV. Recleaning the surface will not fix it. The failed sealer has to be stripped chemically, the pavers cleaned and dried, and a new sealer applied under the right conditions.

Sealer failure is one of the areas where hiring a contractor familiar with humid-climate work matters most. A local paver sealing and repair specialist will know to check moisture content, dew point, and the type of existing sealer before recommending a product.

Your Practical Next Step

Before calling anyone, spend ten minutes with your deck in dry light and note what you see: dark biological staining, white chalky haze, pitted or flaking surfaces, loose joint sand, or cloudy old sealer. Take photos of each condition, including close-ups and one wide shot. That short inventory turns a vague “my deck looks bad” conversation into a specific scope of work, and it makes it much easier to get an accurate quote — whether the answer is a straightforward cleaning and reseal or a full restoration. If you are unsure which category your deck falls into, ask a qualified paver contractor to do an on-site assessment before any pressure washer touches the surface.

Close-up of brick paver joints with sand erosion and gaps on a Tampa Bay FL patio needing repair

ARTICLE

What Happens to Brick Paver Joints When Standing Water Sits for Weeks in Brandon

A look at how prolonged standing water damages brick paver joints and base layers in Brandon, and how to tell minor washout from structural failure.

August in Brandon rarely brings a single storm. It brings a pattern: afternoon downpours, saturated soil, and low spots on patios and driveways that hold water for days at a time. Homeowners often assume that once the puddle evaporates, the paver surface returns to normal. In reality, several days of standing water can quietly reshape what is happening beneath the bricks, and the damage compounds week after week during the rainy season.

How a Healthy Paver Joint Is Supposed to Work

A brick paver system is not a solid slab. It is a flexible assembly of individual units resting on a compacted base of crushed limerock, a thin bedding layer of sand, and joints filled with polymeric or standard jointing sand. The joints are load-transfer devices: when a car tire or a patio chair presses down on one paver, the sand-filled joints distribute that force to the neighbors so no single brick takes the full hit.

That system depends on the joints staying full, the bedding sand staying in place, and the base staying compacted and dry between rain events. Standing water disrupts all three at once.

What Happens in the First 48 Hours of Standing Water

When rainwater cannot drain off the surface, it begins working into the joints. Polymeric sand is designed to resist this, but no jointing product is waterproof, and older joints that have lost their sealer are especially vulnerable. Water finds the paths of least resistance, usually along the edges of the puddle where surface tension pulls it into the sand.

Within a day or two, the top quarter-inch of joint sand becomes saturated. If the sealer above it is aged or peeling, the sand turns pasty, then slowly migrates. You may notice a fine tan or gray silt smeared across the paver faces after the water finally recedes. That silt is your joints leaving.

Week One to Week Two: Bedding Sand Migration

Once surface joints are compromised, water moves down into the one-inch bedding layer beneath the pavers. This is where minor washout becomes a real problem. Bedding sand does not need to disappear entirely to cause trouble. It only needs to shift.

Under a prolonged puddle, water pressure and the slight rocking of pavers under foot or vehicle traffic pumps bedding sand sideways, often out through the paver edges or down into voids in the base. The pavers themselves may still look level from above, but they are now floating on an uneven cushion. This is the stage where a careful inspection and targeted paver patio repair and resealing in the Brandon area can still correct the problem without a full rebuild.

When Efflorescence and Biological Growth Set In

Florida’s humidity turns a wet paver surface into a small ecosystem. Standing water pulls mineral salts up through the concrete pavers and deposits them on the surface as efflorescence, the chalky white haze most Tampa Bay homeowners recognize. Prolonged saturation makes this dramatically worse because the salts have more time to migrate and crystallize.

At the same time, algae, mildew, and moss begin colonizing the damp joints. Once biological growth takes hold in a joint, it holds moisture even after the surface dries, which keeps the joint soft and accelerates the next round of washout. Homeowners often describe this as pavers that “never seem to dry out” after August storms.

Base Failure: The Damage You Cannot See From Above

The most serious damage happens below the bedding layer, in the compacted limerock base. Florida soils, particularly the sandy loams common across Hillsborough and Pasco counties, drain reasonably well when everything is working correctly. But when a low spot holds water for weeks, that water eventually saturates the base and softens the subgrade beneath it.

Symptoms of base failure include a paver or group of pavers that sinks noticeably lower than the surrounding field, a section that rocks when you step on it, or a widening depression that collects even more water after the next rain, creating a feedback loop. Once the base is compromised, surface-level fixes will not hold. The affected section has to be lifted, the base recompacted or replaced, and the pavers reset. If you are seeing this pattern, it is worth reviewing your options for full paver restoration and repair across the Tampa area before the failure spreads.

Telling Minor Washout From Structural Failure

The practical question for a Brandon homeowner is whether the damage is cosmetic or structural. Minor washout usually shows as low joint lines, some sand haze on the surface, and joints that need refilling and resealing. The pavers themselves remain level, stable, and quiet underfoot.

Structural failure shows as movement. Pavers that tilt, rock, or dip under weight indicate the base has shifted. Long, straight depressions along a driveway wheel path or a sunken ring around a pool deck drain are also warning signs. At this point, refilling joints will not solve the problem, and pushing more sealer over an unstable base can actually trap moisture and worsen the situation. A professional assessment, whether from our team or another qualified contractor offering paver sealing and repair services in Wesley Chapel and the surrounding communities, is the right next step.

What to Do Before the Next Rainy Season

If your Brandon patio, driveway, or pool deck has been holding water this summer, the useful next step is a close inspection while conditions are dry. Walk the surface and note any pavers that move, any joints that sit noticeably below the paver faces, and any low areas where water pools within an hour of a normal rain. Photograph them.

Then have those specific areas evaluated by a paver contractor familiar with Florida’s wet-season patterns. Small joint refills, targeted re-leveling, and a fresh sealer application in the fall are far less invasive and less expensive than waiting for a sunken section to grow through another summer. The pavers you have are almost always worth saving; the base beneath them is what determines how much work that will take.

Side-by-side comparison of brick pavers and travertine pavers near a Florida pool, showing different textures and water damage patterns

ARTICLE

Why Travertine Pavers in Pasco County Show Water Damage Differently Than Concrete Pavers

Travertine reacts to Florida humidity in ways concrete pavers do not. Here’s how to read the warning signs on Pasco County driveways, patios, and pool decks.

Travertine is one of the most requested paver materials in Pasco County, prized for its cool surface temperature, natural veining, and upscale look around pool decks and patios. But travertine is not concrete, and it does not behave like concrete when Florida’s summer humidity, afternoon storms, and shallow water table go to work on it. Homeowners who understand what travertine damage actually looks like can catch problems early, before pitting, staining, or spalling turn into a full restoration project.

Two Very Different Materials Under One Florida Sky

Concrete pavers are manufactured from cement, sand, and aggregate compressed into a dense, uniform block. They are engineered to a predictable porosity and typically fail in predictable ways: fading pigment, joint sand washout, and surface efflorescence. Travertine, by contrast, is a natural sedimentary stone formed by mineral springs. It is almost entirely calcium carbonate, and it carries the voids, channels, and density variations of the geology it came from.

That difference matters in Land O Lakes and Wesley Chapel, where daily humidity often sits above 80 percent for months at a time. Concrete resists moisture from the top down. Travertine absorbs it in every direction, including from the base up through the setting bed.

How Water Actually Moves Through Travertine

Travertine’s natural porosity is not a manufacturing defect; it is the material. Rainwater, irrigation overspray, and pool splashout enter through the surface pores and the naturally occurring voids in the stone. During a Pasco County rainy season, saturated pavers can hold moisture for days before fully drying, especially in shaded courtyards or screened lanais with limited airflow.

When that trapped moisture finally evaporates, it carries dissolved minerals to the surface. On concrete, this shows up as the familiar white haze of efflorescence. On travertine, the same process can etch the surface, enlarge existing voids, and leave a chalky, uneven appearance that many homeowners mistake for dirt.

The Warning Signs Unique to Travertine

The earliest sign of moisture trouble on travertine is usually a subtle darkening in patches, not the uniform wet look you would see on concrete. These patches indicate that specific stones are holding water longer than their neighbors, often because of a compromised setting bed or a low spot that pools runoff.

Next comes pitting. Small surface voids that were once cosmetic begin to open up as calcium leaches out. You may also notice a fine grit accumulating on the stones after a rain, which is the travertine itself breaking down. On a concrete paver, you would more likely see color loss or joint erosion before the block itself degraded. Homeowners considering a full refresh often turn to a professional paver restoration and repair evaluation at this stage, before the damage compounds.

Staining Patterns That Point to the Source

Rust-colored stains that bloom outward from a single point usually indicate iron in the stone or in nearby irrigation water reacting with moisture. Concrete pavers can also rust-stain, but the pattern is typically surface-deep and lifts with the right cleaner. On travertine, the iron often sits within the stone itself, and aggressive acidic cleaners will damage the calcium matrix while trying to remove the stain.

Dark organic staining behaves differently too. Mildew and algae penetrate the porous travertine surface rather than clinging to it, which is why pressure washing alone rarely produces lasting results on stone the way it can on denser concrete pavers. This is particularly common on north-facing patios and shaded pool decks in Wesley Chapel, where a travertine pool deck specialist (live Aug 23) can identify whether the discoloration is surface biological growth or a deeper mineral issue.

Why Sealing Travertine Is a Different Conversation

Sealing a concrete paver is largely about locking in color, stabilizing joint sand, and adding a sacrificial wear layer. Sealing travertine is about managing moisture movement without trapping water inside the stone. A film-forming sealer that works beautifully on concrete can be a disaster on travertine, causing cloudiness, adhesion failure, and even accelerated spalling as trapped vapor pushes the sealer off from below.

Penetrating impregnators, breathable enhancers, and honed-versus-tumbled finish considerations all factor in. In Pasco County’s climate, the timing of sealing matters as much as the product. Applying sealer to travertine that has not fully dried after a humid stretch or a heavy rain will trap moisture and produce exactly the problems the sealer was meant to prevent.

Prevention Steps Homeowners Can Take Now

Redirect irrigation heads that are hitting the pavers directly. Keep landscape mulch and soil from bridging over the edge restraint, which wicks moisture into the base. Sweep polymeric sand joints annually and refill any low spots where water is collecting. On pool decks, rinse salt and pool chemistry off the stone after heavy use, since chlorinated and salt-treated water both accelerate calcium loss.

If your travertine is more than a few years old and has never been resealed, schedule an inspection before the next rainy season, not after. Homeowners in Lutz and the surrounding area often benefit from a scheduled paver cleaning and sealing assessment to catch early moisture issues while they are still cosmetic.

Your Next Step

Walk your travertine surfaces this week with a specific eye for the signs above: uneven drying patterns, fresh pitting, chalky residue, and any staining that has grown since last season. Take a few photos in good light so you have a baseline. If anything looks like it has changed, bring in a paver professional who works with natural stone specifically and can recommend the right cleaning and sealing approach for Pasco County’s climate, rather than a one-size-fits-all treatment built around concrete.

Before and after paver sealing on a Tampa Bay pool deck showing weather-damaged pavers restored to like-new condition

ARTICLE

Why August Is the Month Paver Sealers Get Pushed Past Their Limits in Tampa Bay

August combines peak heat, UV, and afternoon storms in ways that break down paver sealer faster than any other month in Tampa Bay. Here’s what to inspect before fall.

If your paver driveway, patio, or pool deck was sealed a year or two ago, August is the month that will tell you the most about how that sealer is holding up. Between the surface temperatures baking into the concrete, the ultraviolet load from long summer days, and the near-daily thunderstorms rolling off the Gulf, Tampa Bay pavers get subjected to a stress cycle that no other month quite matches. Understanding why matters, because the damage that starts in August often shows up as failure in October.

The Three-Way Squeeze on Sealer in August

Paver sealer is designed to flex, shed water, and resist UV. It handles any one of those stressors reasonably well on its own. August is difficult because all three arrive at once and repeat, day after day, for four to five weeks. Surface temperatures on a sunlit driveway in Tampa or Brandon regularly climb well past the ambient reading, softening the top layer of sealer. UV then attacks the softened film. A few hours later, a heavy storm dumps an inch of rain on that same surface while it is still warm.

That cycle—soften, degrade, quench, repeat—is what pushes sealers past the point they were engineered to tolerate. It is also why manufacturer test data from milder climates rarely predicts real-world life in Florida.

Why Afternoon Thunderstorms Are Harder on Sealer Than Steady Rain

A slow, all-day rain is actually gentler on a sealed paver surface than a Tampa Bay thunderstorm. Afternoon storms hit hot pavers with cold rain, and that thermal shock causes the sealer film to contract quickly against a substrate that is still expanded from heat. Over enough cycles, micro-cracking develops in the film, especially at joint edges and along paver chamfers where the coating is thinnest.

Once those micro-cracks open, water gets under the sealer. That is when you start seeing the cloudy white blush homeowners often mistake for a cleaning problem. It is usually trapped moisture, and it signals that the sealer’s bond to the paver is compromised.

Humidity, Efflorescence, and the Joint Sand Problem

August humidity in Hillsborough, Pasco, and Pinellas counties routinely sits above 75 percent at night. That moisture wicks up through the base and into the paver body, carrying dissolved minerals with it. When it reaches a sealed surface that cannot breathe well—often the case with older solvent-based coatings that have started to yellow—those minerals deposit as efflorescence just under or on top of the sealer.

Polymeric joint sand takes a beating too. Repeated saturation softens the binder, and foot traffic or pressure washing can pull weakened sand out of the joints. Homeowners in areas like Lutz who invest in professional paver cleaning and re-sealing at the right interval typically avoid the cascade where failing sand leads to shifting pavers and standing water.

Pool Decks and Coastal Salt-Air Exposure

Pool decks carry a second load in August: chlorinated splash-out combined with sunscreen residue, both of which chemically attack sealer films already softened by heat. Travertine and marble decks are especially sensitive because their natural porosity absorbs contaminants quickly when the sealer thins.

Closer to the coast in Clearwater and St. Petersburg, salt-laden air adds another factor. Salt crystallizes in pores as humidity swings, and it accelerates the breakdown of any sealer chemistry not formulated for marine exposure. If you own a home near the water and are seeing dulling or flaking around the pool coping, a pool deck sealing and repair evaluation before the fall entertaining season is worth scheduling.

What a Late-August Inspection Should Cover

A useful late-summer inspection is not just a visual walk-around. It should include checking for water beading behavior across different sections of the surface, since sealer often fails in patches rather than uniformly. High-traffic tire paths on a driveway will lose water repellency long before the edges do. Around a patio, the areas under furniture may look fine while the exposed field is already compromised.

Inspectors should also look at joint sand height, edge restraints, and any low spots that have started to hold water after storms. Small settlement issues caught in August are inexpensive to correct; the same problems in December, after months of continued water infiltration, often require lifting and resetting sections. For homeowners dealing with visible sinking, staining, or lifted pavers, paver restoration and repair work is best planned before the drier fall weather makes scheduling tighter.

Why Timing Matters Before the Fall Reseal Window

Sealer needs a dry substrate and moderate temperatures to cure properly. October and November in Tampa Bay typically deliver both, which is why they are the strongest months for resealing. But contractor calendars fill quickly once the rainy season winds down. Homeowners who identify problems in late August have time to plan, get on a schedule, and address any repair work before the resealing itself.

Waiting until you can visibly see the sealer failing usually means you have already lost some protection to the substrate. Catching the early signs—subtle color loss, reduced water beading, faint efflorescence—keeps the project in the maintenance category rather than the restoration category.

A Practical Next Step for Tampa Bay Homeowners

Walk your driveway, patio, or pool deck this week after a rain. Note where water beads and where it soaks in. Look at joint sand levels and check for any whitish haze along paver edges. If you see uneven performance, faded areas, or moisture that lingers longer than it used to, put a professional inspection on the calendar before the end of September. That single step is what separates a routine reseal from a much larger repair project once fall arrives.

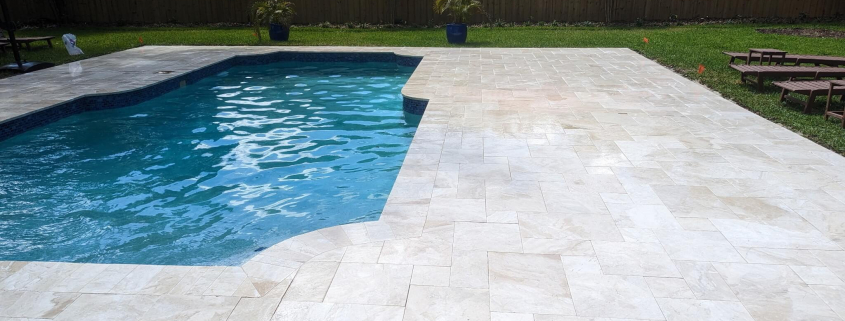
Travertine paver pool deck at a Lutz FL home showing light-colored natural stone pavers surrounding a backyard pool

ARTICLE

What Happens to a Travertine Patio in Lutz When Sealer Starts to Delaminate

A practical guide for Lutz homeowners on spotting sealer failure on travertine pavers, why Florida’s humidity accelerates delamination, and what to do next.

If you own a travertine patio in Lutz, you already know how well the stone handles the Florida sun compared to darker concrete pavers. What surprises many homeowners is how differently travertine behaves when the sealer on top begins to fail. Instead of quietly fading, a compromised sealer film often announces itself mid-summer with cloudy patches, sticky spots, and lifting flakes. Understanding what you’re seeing — and why it’s happening — is the first step to protecting the stone underneath.

Why Travertine Reacts Differently Than Concrete or Brick Pavers

Travertine is a natural stone formed from calcium carbonate, and it’s genuinely porous. Under a microscope, the surface looks less like a solid slab and more like a sponge with thousands of interconnected voids. Concrete and clay brick pavers are porous too, but their pore structure is more uniform and their surface chemistry is more forgiving of trapped moisture.

When sealer is applied to travertine, it bridges those natural voids and forms a film that sits partly on the surface and partly inside the stone. If moisture gets trapped below that film, travertine has fewer escape routes than a concrete paver does. The result is a sealer that fails from underneath rather than from wear on top.

The First Visual Sign: Cloudy White Blushing

The earliest symptom Lutz homeowners usually notice is a milky, whitish haze across sections of the patio, especially in shaded areas or spots near screen enclosures where airflow is limited. This is often called blushing, and it’s caused by water vapor caught between the stone and the sealer film.

Blushing tends to appear a day or two after a heavy rain, then partially clear when the sun bakes the surface, then return with the next storm. That cycling is the tell. A permanent color change from staining doesn’t come and go; trapped moisture does.

Bubbling and Blistering in the Summer Heat

Once trapped moisture combines with surface temperatures that regularly exceed 120 degrees on a Florida patio, the sealer film begins to lift into small bubbles or blisters. Some are the size of a pinhead. Others can span several inches, particularly on wide-format travertine tiles where the surface area under the film is larger.

Blistering is not just cosmetic. Each bubble is a pocket where the sealer has separated from the stone, meaning the protective bond is already broken in that area. Foot traffic, patio furniture, and pool splash-out will eventually break those blisters open, leaving ragged edges that catch dirt and grow larger over the rainy season.

Peeling, Flaking, and White Powder at the Edges

As delamination progresses, blisters tear and the sealer begins peeling in irregular sheets. On travertine, you’ll often see two failures happening at the same time: the sealer lifting away, and a chalky white residue collecting along grout lines and the edges of each stone.

That white residue is efflorescence — mineral salts migrating up through the stone and depositing on the surface as moisture evaporates. Efflorescence is common on new hardscapes anywhere, but on a sealed travertine patio it signals that water is moving through the stone freely and the sealer is no longer regulating that exchange. Left alone, the salts can etch the surface and make the next sealer application harder to bond.

Why Florida’s Humidity Cycle Accelerates the Problem

In drier climates, a sealer applied to travertine might last five to seven years before showing significant wear. In Tampa Bay, the same products commonly fail in two to three, and sometimes in a single season if they were applied incorrectly.

The reason is the daily humidity swing. Overnight, dew and high relative humidity push moisture into the stone. By mid-morning, direct sun drives that moisture back out as vapor. A sealer film that isn’t formulated as breathable, or that was applied too thickly, traps that vapor and takes the beating. Add afternoon thunderstorms from June through September, and the film is essentially being pressure-cycled every twenty-four hours. Sealers built for concrete driveways in Georgia or Texas simply weren’t designed for that pattern.

What You Should Not Do When You See These Signs

One of the most common mistakes seen across Lutz, Wesley Chapel, and Land O Lakes is a homeowner applying a fresh coat of sealer over failing sealer to hide the haze. This almost always makes things worse. The new coat traps the same moisture the old coat was struggling with, and now you have two films delaminating together.

Pressure washing at high PSI is another common misstep. Travertine is soft compared to concrete, and aggressive pressure will pit the surface and drive water deep into the stone, extending the drying time needed before any restoration work can begin.

The Practical Next Step for Your Patio

If you’re seeing blushing, bubbles, or peeling on your travertine pavers, the correct sequence is chemical sealer removal, a thorough neutralizing rinse, a proper drying window measured against Florida’s dew point rather than the calendar, and re-sealing with a breathable product formulated for natural stone in a humid climate.

Before that work begins, walk your patio in the morning and again in the late afternoon and take photos of any areas that look different at those two times. Note where water pools, where the screen shades the stone, and where furniture sits. Those observations tell a restoration professional exactly where the sealer failed first and why — and they turn a guess into a plan that will actually hold up through the next rainy season.

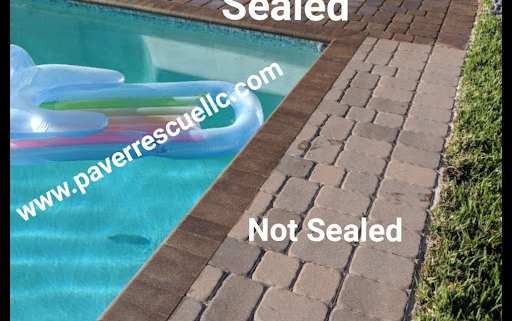
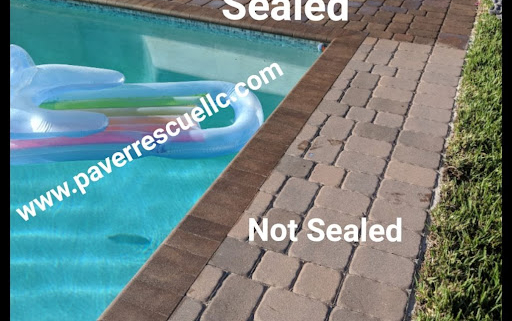
Sealed vs. unsealed pool deck pavers side-by-side comparison at a Florida home, showing the difference sealing makes.

ARTICLE

Pool Deck Pavers in St. Petersburg: Why Bare Feet and Salt Air Are Wearing Out Your Surface

Coastal pool decks in St. Petersburg face a double threat: constant foot abrasion and airborne salt. Here is why your sealer fails early and what a proper restoration looks like.

If you own a home within a few miles of the Gulf in St. Petersburg, you have probably noticed that your pool deck pavers do not age the way your neighbor’s driveway does two counties inland. The color fades sooner, the joints seem to loosen faster, and the sealer that looked crisp last spring feels chalky by the following summer. That is not a coincidence, and it is not poor workmanship. It is the specific chemistry and physics of a coastal pool deck.

The Two-Factor Problem Coastal Homeowners Face

Pool deck pavers in St. Petersburg endure two wear mechanisms that inland installs rarely see together. The first is mechanical: bare feet, pool toys, and dragged furniture creating constant low-grade abrasion on the sealed surface. The second is chemical: salt-laden air depositing chloride ions that migrate into the paver body and the sealer film itself.

Individually, either force is manageable. Combined, they compound. Abrasion opens micro-scratches in the sealer, and salt air exploits those openings to reach the paver beneath. What would be a five- to seven-year sealer cycle on a Lutz patio can shrink to two or three years on a coastal Pinellas deck.

Why Bare Feet Do More Damage Than You Think

A pool deck is one of the few hardscapes on your property walked on almost exclusively barefoot or in soft-soled sandals. That sounds gentle, but wet feet act like a fine polishing pad. Every step drags a thin film of pool water, sunscreen residue, and grit across the sealer. Over a busy Florida summer, that can amount to thousands of passes across the same threshold and step-out zones.

The result is a wear pattern most homeowners misread as fading. The sealer has not discolored; it has been physically thinned. Once the film drops below a certain thickness, UV and moisture start attacking the paver’s pigmented surface directly.

How Salt Air Attacks the Paver Itself

St. Petersburg sits on a peninsula, and prevailing Gulf breezes carry aerosolized salt inland for miles. That salt settles on horizontal surfaces — including your pool deck — where it dissolves in humidity and dew, then wicks into the porous top layer of the paver during dry cycles.

Inside the paver, chloride and sulfate ions react with free lime in the concrete. When those reactions push moisture back to the surface, you get efflorescence: that white, hazy bloom that will not scrub off with soap and water. On a coastal deck, efflorescence is not a one-time break-in issue. It recurs every rainy season because the salt supply never stops.

Why Sealers Fail Earlier Near the Coast

A quality paver sealer is designed to breathe, letting vapor escape while blocking liquid water. Salt changes that equation. As chloride concentrations rise inside the paver, the vapor moving upward carries dissolved minerals. Those minerals crystallize at the sealer interface, creating tiny pressure points that lift the film from below.

Add the mechanical abrasion from foot traffic above, and the sealer is being stressed from both sides simultaneously. This is the mechanism behind the flaking, cloudy, or blotchy look many coastal Pinellas homeowners see two summers after a sealing job that was, in fact, done correctly. The product was not wrong; the reapplication schedule was.

What a Proper Coastal Restoration Cycle Looks Like

For pool deck pavers within the salt-influence zone — roughly the barrier islands, downtown St. Pete, Snell Isle, Shore Acres, and points along the Gulf and Tampa Bay — a shorter, more deliberate cycle than the industry default is generally recommended.

A proper restoration begins with a deep clean using a surface cleaner rather than a wand tip, which prevents joint blowout. Any existing failed sealer is stripped rather than sealed over. Efflorescence is neutralized with a dedicated cleaner, not just pressure-washed, because pressure alone drives salts deeper. Joints are re-sanded with polymeric sand rated for pool environments, and only then is a breathable, wet-look or matte sealer reapplied in two thin coats.

Signs Your Deck Is Due Now, Not Next Year

Homeowners often wait for dramatic failure before calling. On a coastal deck, that is usually a year too late. The signals to watch for are subtle: a chalky feel underfoot when the deck is dry, water that no longer beads at the pool coping, joint sand that sits low or washes out after storms, and a hazy white cast that returns within days of cleaning.

If you are seeing two or more of those signs, salt has already breached the sealer and is working on the paver body. Waiting through another hurricane season, with its wind-driven salt spray and prolonged wet-dry cycles, will typically double the scope of the eventual repair.

Your Practical Next Step

Walk your deck barefoot this weekend, ideally the morning after a rain. Note where the surface feels rough, where water pools instead of sheeting off, and where the color between pavers looks uneven. Take a few photos in natural light, including close-ups of the joints and the area right around the pool coping.

Those observations give any reputable paver restoration contractor in the St. Petersburg area enough information to quote accurately and to tell you whether you need a full strip-and-reseal or a maintenance clean-and-recoat. Either way, catching a coastal deck at the right point in its wear curve is the difference between a straightforward service call and replacing pavers that could have been saved.

Before and after paver cleaning on a Tampa Bay pool deck, showing algae and mold removal on unsealed pavers

ARTICLE

Why Algae and Mold Spread So Fast on Unsealed Pavers in a Tampa Bay July

A look at why unsealed pavers in Tampa Bay turn green almost overnight in midsummer, and what Florida homeowners can do about it before the damage sets in.

If you own a paver driveway or patio in Tampa Bay, you have probably noticed the same pattern every year. May looks fine. June starts to darken at the edges. By late July, entire sections of a Brandon patio or a Lutz pool deck can shift from warm terracotta to a dull green-gray in a matter of weeks. It is not your imagination, and it is not a coincidence. Florida’s peak summer creates near-perfect conditions for biological growth on unsealed concrete pavers, and understanding the science behind it makes the case for mid-summer restoration a lot clearer.

The Four Ingredients Algae and Mold Need

Algae, mildew, and mold on hardscape surfaces all require the same basic inputs: moisture, warmth, a food source, and a porous surface to colonize. In most of the country, one or two of those inputs are limited for much of the year. In Tampa Bay in July, all four are present at the same time, every single day.

Daytime highs sit in the low 90s. Overnight lows rarely drop below 75. Relative humidity averages above 75 percent, and afternoon thunderstorms deliver measurable rain on roughly two out of every three days. That is a growth chamber, and your pavers are inside it.

Why Unsealed Pavers Are Especially Vulnerable

Concrete pavers are porous by design. The same texture that gives them slip resistance and a natural look also gives microorganisms thousands of small footholds per square foot. When a paver is unsealed, rainwater does not bead up and run off. It soaks into the surface and stays there.

That trapped moisture is the key variable. A sealed paver sheds water in minutes. An unsealed paver in a shaded Wesley Chapel backyard can stay damp for hours after a storm, and in some low spots it never fully dries between afternoon rains. Algae spores, which are always present in the air, land on that damp surface and begin to reproduce within days.

The Role of Daily Thunderstorms and Standing Water

Tampa Bay’s summer storm pattern is unusually consistent. Warm Gulf air, sea breezes from both coasts, and afternoon heating produce short, heavy downpours that dump an inch or more of rain in under an hour. Pavers that were installed with even slightly imperfect drainage will pond water after storms like these.

Standing water is the accelerant. It saturates the joint sand, keeps the paver body wet from below, and creates the microclimate where black mold and slick green algae thrive. Homeowners in Clearwater and St. Petersburg who are closer to the coast also deal with salt-laden humidity, which does not directly feed algae but does keep surfaces damper for longer.

Joint Sand: The Overlooked Culprit

Most homeowners focus on the top of the paver, but the joints between pavers are often where the problem starts. Traditional joint sand holds water like a sponge. Once it stays wet long enough, moss and mildew establish in the seams and then spread outward onto the paver faces.

Polymeric sand and properly applied joint stabilizing sealers change that equation. They lock the joints, shed water, and eliminate the damp reservoir that feeds growth. This is one of the reasons a full restoration is more effective than surface cleaning alone.

Why Mid-Summer Feels Urgent, Not Optional

By late July, growth on an untreated driveway is not just cosmetic. Algae films are genuinely slippery, especially on pool decks and shaded walkways, and that becomes a safety issue for families and older visitors. Mold and mildew also begin to break down the surface of the paver itself, etching the cement paste and leaving the aggregate exposed. Left alone through August and September, a driveway that only needed cleaning and sealing in June may need grinding, re-sanding, and color enhancement by fall.

There is also a practical scheduling factor. Reputable paver cleaning Tampa Bay crews book out quickly once the green shows up on everyone’s patios at the same time. Homeowners who wait until the problem is obvious often wait weeks for service, during which the damage compounds.

What Proper Cleaning and Sealing Actually Does

A professional restoration is not a pressure wash and a spray coat. It typically involves a low-pressure chemical treatment that kills the biological growth at the root, a controlled rinse that lifts organic staining without blasting out joint sand, fresh polymeric sand in the seams, and a breathable sealer matched to Florida’s humidity. That last point matters. Sealers formulated for drier climates can trap moisture inside the paver and cause hazing or efflorescence, which is why regional experience is worth asking about.

Once sealed correctly, the same paver that turned green in six weeks can go two to three years between treatments, even through Florida summers.

A Practical Next Step for Tampa Bay Homeowners

If your pavers are already showing green tint, black speckling, or slick patches after rain, the most useful thing you can do this week is a simple assessment. Walk the surface after a storm and note where water stands longest. Check the joints for sand loss or moss. Look at shaded areas near screen enclosures and under pool cage edges, where growth almost always starts first. Then get a professional evaluation before the problem moves from cleanable to repairable. In a Tampa Bay July, a few weeks of delay is the difference between a maintenance visit and a full restoration.