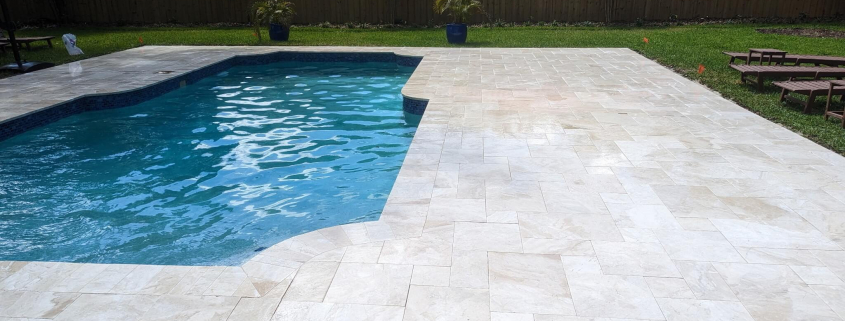
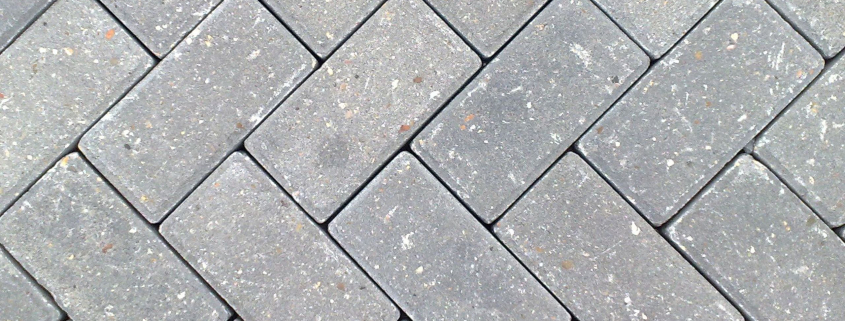
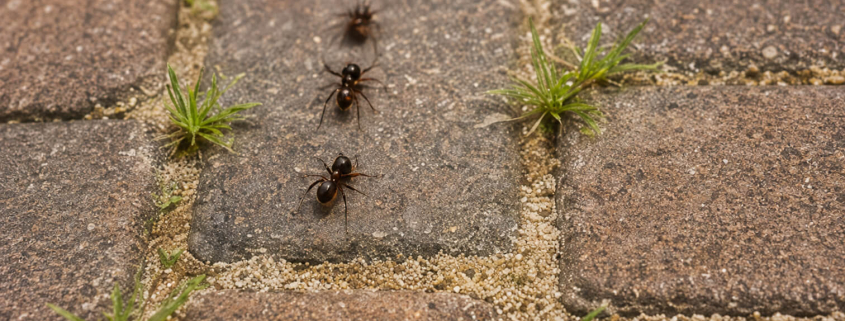
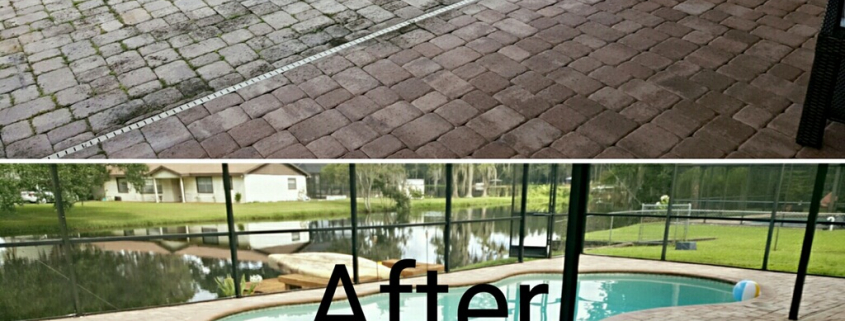
Paver pool deck with sand joint failure in Lutz FL, showing gaps needing professional stabilization before summer storms

ARTICLE

Sand Joint Stabilization: Why One Heavy June Storm Can Undo a DIY Fix

A single heavy June storm can wash out a DIY polymeric sand job overnight. Here’s why proper sand joint stabilization matters before Florida’s rainy season hits.

Every June, homeowners across Wesley Chapel and Lutz watch the first real thunderstorms of the season roll in and notice something unsettling the next morning: gray streaks of sand washed across their pavers, gaps between stones that weren’t there a week ago, and a haze on the surface that looks like dried milk. In most cases, the culprit is a polymeric sand installation that wasn’t built to handle Florida’s summer rain volume. Sand joint stabilization is one of the most misunderstood steps in paver maintenance, and it’s the step where DIY work fails first.

What Sand Joint Stabilization Actually Does

The sand between your pavers isn’t filler. It’s a structural component. Properly installed joint sand locks individual stones into an interlocking system, so the surface behaves as a unified field rather than hundreds of loose pieces. When the joints are stable, weight distributes across multiple pavers, weeds can’t root, and water sheds across the surface instead of draining straight into the base.

Polymeric sand — the kind activated with water to form a flexible binder — is the current standard for stabilization. When it’s installed correctly, it stays put through hurricanes, pressure washing, and a decade of UV exposure. When it isn’t, it can fail within a single afternoon storm.

Why Florida Rain Is a Different Animal

A typical Tampa Bay summer storm doesn’t deliver rain the way the polymeric sand bag instructions assume. Manufacturers test for moderate, steady rainfall. What we get in June, July, and August is concentrated: two to three inches in forty-five minutes, often with wind-driven sheeting and standing water that lingers on the surface.

That intensity matters because polymeric sand needs to cure in a specific sequence. The binder activates with a measured amount of water, sets up over 24 to 48 hours, and only then can it tolerate flooding. A DIY installation that gets hit by a pop-up storm before it cures will liquefy, foam at the surface, and migrate out of the joints. By morning, the binder is gone, leaving behind sand that behaves like ordinary play sand.

The Most Common DIY Failure Points

The same handful of mistakes appear on homes from Brandon to Clearwater. The first is skipping the deep clean. Polymeric sand needs to bond to clean joint walls, and if old sand, dirt, or efflorescence is still in place, the new material sits on top of contamination and shears off under load.

The second is underfilling. Joints should be packed to roughly an eighth of an inch below the chamfer of the paver. Shallow fills leave the binder exposed to direct rain impact, which erodes it before it can knit together. The third is overwatering during activation — running a hose instead of misting — which floats the polymer out of the joint before it can set.

Efflorescence, Humidity, and the Hidden Variable

Florida’s humidity complicates curing in ways that aren’t obvious. Polymeric sand cures by losing moisture in a controlled way. When ambient humidity sits at 85 percent for days, that drying curve flattens, and the sand can stay soft well past the window the label promises.

Humidity also drives efflorescence, the white mineral haze that appears on pavers as moisture migrates up through the stone. If sand stabilization is done over a surface that’s already pulling moisture, the binder can trap that haze in the joints, leaving a permanent white film along every seam. Professionals test moisture content and time the work around weather windows, which is harder to do on a Saturday afternoon than it sounds.

What Professional-Grade Stabilization Looks Like

A proper job starts with full removal of the existing joint material, not just a surface sweep. Compressed air and specialized blades are used to clear joints down to a consistent depth, then the base is inspected for settling or washout that needs correction before any sand goes in.

The sand itself is matched to the joint width and paver profile — not every polymeric product works on wide joints, travertine, or tumbled stone. Activation is done with a calibrated mist, in stages, with surface residue removed between passes. On pool decks in St. Petersburg or coastal Pinellas properties, chlorine and salt exposure factor into product selection. The result is a joint system that survives both the rainy season and the slow grind of Florida sun.

Timing the Work Around the Rainy Season

The best window for sand joint stabilization in the Tampa Bay area runs from late winter through May, before the daily storm pattern sets in. Work done in this window has weeks of dry curing time before the first sustained rain event. Once June arrives, scheduling gets tighter because crews need three to four consecutive dry days, and those windows get scarce.

If your pavers are already into the season with failing joints, the answer isn’t to wait it out. Open joints accelerate base erosion, and each storm that passes through unsealed joints washes more bedding sand from underneath the stones. That’s how a sand problem becomes a settling problem, which becomes a re-lay.

A Practical Next Step

Walk your driveway, patio, or pool deck after the next rain and look at the joints. If you see sand on the surface, gaps deeper than a quarter inch, weeds or ants taking hold, or a chalky residue along the seams, your stabilization has already started to fail. Take a few photos in good light, note which areas pool water, and get a professional assessment before the next storm cycle. Catching joint failure early is the difference between a sand refresh and a full restoration.

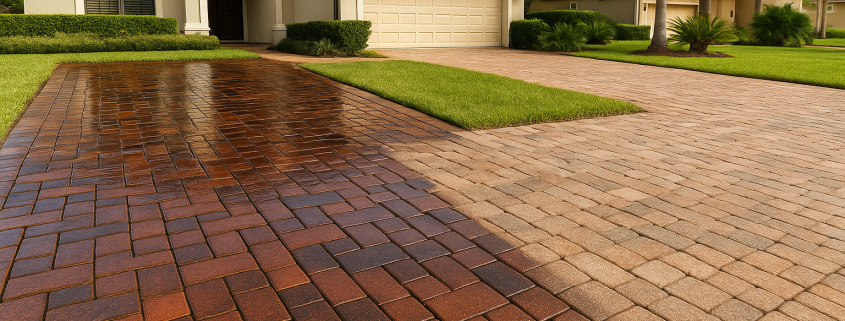
Freshly sealed paver driveway at a Tampa Bay Florida home showing restored color after rainy season fading

ARTICLE

Why Your Wesley Chapel Paver Driveway Looks Faded After One Rainy Season

Florida’s UV and rainy-season moisture can drain the color from a paver driveway in months. Here’s how to diagnose fade before assuming you need replacement.

You installed a beautiful paver driveway in Wesley Chapel last spring. It looked rich, warm, and crisp. Then the summer storms rolled through, the sun did its work between downpours, and now the surface looks washed out, blotchy, and ten years older than it should. Before you call a contractor about replacement, it helps to understand what actually happened — because in most cases, the pavers themselves are fine. The finish is the problem.

What Fading Really Is

Concrete pavers get their color from iron oxide pigments mixed into the top layer during manufacturing. These pigments are stable, but they sit inside a porous cement matrix that is vulnerable to weathering. When the surface of that matrix erodes, the pigment loses its visual depth. You are not seeing the color disappear so much as you are seeing the carrier around it break down.

That is why fade often looks uneven. High-traffic tire paths fade faster than the edges. South-facing sections lose tone before shaded ones. The pavers have not changed chemically — their surface has been altered.

How Florida UV Speeds the Process

Tampa Bay averages more than 240 sunny days a year, and our UV index regularly climbs into the “very high” and “extreme” range from April through September. Ultraviolet radiation breaks down organic binders and accelerates oxidation in the cement surface. On unsealed pavers, that means the top layer slowly chalks. On pavers sealed with a low-grade or expired product, UV degrades the sealer itself, which then traps a hazy film over the color you used to see.

This is one reason fade in Florida is not a slow, decade-long process the way it is in cooler climates. A driveway in Wesley Chapel can show meaningful color loss in a single year.

The Rainy Season Multiplier

From June through September, Tampa Bay typically receives more than half its annual rainfall. Afternoon storms saturate the pavers, then the sun bakes them dry within an hour. That repeated wet-dry-wet-dry cycle is harder on a paver surface than constant rain or constant sun would be.

Each cycle pulls dissolved minerals up through the paver as it dries, leaving behind efflorescence — that white, chalky haze you see on driveways across Pasco County by August. Efflorescence does not just look bad. It physically lifts pigment-bearing fines off the surface and washes them into your joints and lawn. Once the rainy season ends, the dry crust gets blown or rinsed away, and the color underneath has thinned with it.

Why Sand Joints Matter More Than Homeowners Think

The joints between pavers are part of the system. When polymeric sand is missing, washed out, or never installed correctly, water moves laterally beneath the pavers instead of running off the top. That undermines the base, encourages weed growth, and lets moisture wick up through the sides of each paver, which intensifies efflorescence and accelerates edge fade.

If you see ants, weeds, or visible gaps between your pavers, that is not a cosmetic problem. It is a moisture problem that is feeding the fade you are noticing on top.

How to Tell Fade From Permanent Damage

Here is a simple field test. Pour a cup of clean water on a faded section. If the color comes back vividly while the paver is wet and then fades as it dries, your pigment is intact — you are looking at a sealing and surface issue, not paver failure. This is the most common scenario seen across Lutz, Wesley Chapel, and Land O Lakes.

If the wet color is still dull, or if the paver surface feels gritty and sheds sand when you rub it, the cement cap has eroded further and you are into restoration territory rather than simple resealing. Even then, replacement is rarely necessary. Proper cleaning, joint refill, and a quality sealer can pull the color back convincingly.

What Proper Paver Restoration Looks Like in Tampa Bay

Paver restoration in Tampa Bay is not the same job as resealing a driveway in Atlanta or Phoenix. The humidity here means a sealer has to cure correctly between storm systems, breathe enough to release trapped moisture, and resist the constant biological pressure of algae and mildew. A solvent-based sealer applied on a humid afternoon will cloud. A water-based sealer applied too thick will peel by the next summer.

A correct restoration starts with deep cleaning to remove efflorescence, biologicals, and old failed sealer. Joints are refilled with polymeric sand rated for our climate. Then a sealer suited to the paver type and finish goal — matte, satin, or wet look — is applied in the right conditions. Done well, this resets the clock on your driveway for several years.

Your Next Step

Before you assume a faded driveway means a costly replacement, do the water test and walk the joints. If the color comes back when wet and your joint sand is intact, you are a good candidate for restoration rather than tear-out. If you would like a straight assessment of what your driveway actually needs — and an honest answer about whether restoration will hold up through next year’s rainy season — reach out for an on-site evaluation. A short visit usually answers the question for good.

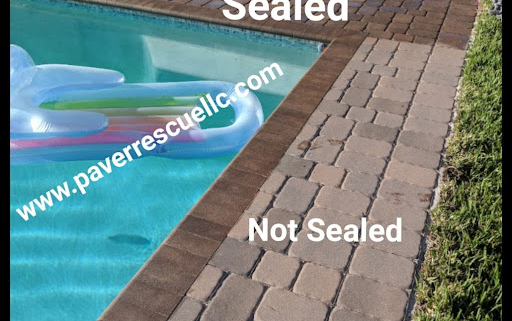
Sealed vs. unsealed pool deck pavers side-by-side comparison at a Lutz, FL home showing travertine coping results

ARTICLE

Is Travertine Pool Coping in Lutz Holding Up to Florida's Summer Heat?

Florida’s UV, humidity, and rainy season weather travertine coping differently than concrete pavers. Here’s what to watch for in Lutz and how to seal it properly.

Travertine has been the go-to pool coping material for Lutz and the surrounding Pasco County neighborhoods for years, and for good reason: it stays cooler underfoot than concrete pavers, it has a high-end look, and it pairs well with screened lanais. But by late summer, plenty of homeowners start noticing changes — small pits, dull patches, dark streaks near the waterline. The question is whether the stone is failing, or whether it’s simply telling you it needs attention.

Why Travertine Behaves Differently in Florida

Travertine is a natural sedimentary stone formed around mineral springs. It’s porous by design, with visible voids that are usually filled at the factory with resin or cementitious filler. That porosity is what keeps it cool in July, but it’s also what makes Florida’s climate so hard on it. Every afternoon thunderstorm pushes water into those pores, and every morning of direct sun pulls it back out, carrying dissolved minerals with it.

Concrete pavers, by contrast, are manufactured to a consistent density and respond well to film-forming sealers. Travertine doesn’t — and using the wrong product is one of the most common reasons coping in Lutz starts looking worse, not better, after a sealing job.

The Weathering Patterns Homeowners Are Seeing

Three issues show up again and again on Pasco County pool decks. The first is pitting: the factory-applied filler in the travertine’s natural voids breaks down under UV and chlorinated splash-out, leaving small pockmarks that catch dirt and algae. The second is discoloration — usually a yellow or gray cast that develops on coping facing the western sun. The third is sealer failure, which can look like cloudy white patches, peeling film, or a blotchy finish where some areas absorbed sealer and others rejected it.

None of these mean the stone itself is ruined. They do mean the original protection has run its course, and the next step needs to be chosen carefully.

Why the Wrong Sealer Makes Things Worse

A common mistake is treating travertine like a concrete paver and applying a glossy, film-forming acrylic sealer. On concrete, that film sits on the surface and sheds water. On travertine, it traps moisture inside the stone. In Florida’s humidity, that trapped moisture has nowhere to go, and within a season or two you get the milky white blush that homeowners often mistake for efflorescence.

True efflorescence — mineral salts migrating to the surface — is a separate issue, and it’s especially common on coping that sits next to a saltwater pool or a chlorinated system with heavy splash-out. Both problems require the sealer to breathe.

What Proper Travertine Sealing Looks Like

For travertine pool coping in Florida, the correct approach is almost always a penetrating, breathable sealer — typically a silane or siloxane-based product, sometimes with a fluoropolymer additive for stain resistance. These products soak into the stone and bond inside the pores rather than forming a film on top. Water beads off, but vapor can still escape, which is critical in a climate that swings from 95% humidity at sunrise to direct sun by noon.

Before any sealer goes down, the coping needs a thorough cleaning with a stone-safe alkaline cleaner, not the acid washes sometimes used on concrete. Acid etches travertine and accelerates the pitting problem. Any failed filler in the voids should be repaired with a color-matched grout or polyester filler before sealing, or the new sealer will simply settle into the holes and look uneven.

Timing the Work Around the Rainy Season

In Lutz, Land O’ Lakes, and Wesley Chapel, the practical window for sealing travertine is narrower than people expect. The stone needs to be genuinely dry — not just surface-dry — before a penetrating sealer can bond. After a typical summer afternoon storm, that can take 48 to 72 hours of dry weather, longer if the coping is shaded by a lanai cage or screen enclosure.

Late fall through early spring is usually the most reliable stretch for this work in Pasco County. If a summer job is unavoidable, it requires watching the radar closely and sometimes using a moisture meter on the stone before starting. Sealing damp travertine is one of the fastest ways to create the blush and adhesion problems described earlier.

How Often Travertine Coping Needs Re-Sealing

Most penetrating sealers on Florida travertine last two to four years, depending on sun exposure, pool chemistry, and how heavily the deck is used. Coping that gets constant splash-out from a saltwater pool will wear faster than a shaded patio surface. A simple field test: spray a small section with water. If it beads and rolls off, the sealer is still active. If it darkens the stone and soaks in within a few seconds, it’s time to plan the next application.

Pressure washing between sealing cycles should be done at low pressure and a wide fan tip. High-pressure cleaning is responsible for a surprising amount of the pitting we see on older Lutz pool decks.

A Practical Next Step

If your travertine coping is showing pitting, discoloration, or any sign of a previous sealer breaking down, the first move is a close inspection rather than a quick re-seal. Identify which filler has failed, whether the existing sealer is film-forming or penetrating, and whether the stone is dry enough to accept new product. A reputable paver and stone restoration contractor working in the Tampa Bay area should be willing to walk you through what they see before recommending a treatment plan. That conversation is usually worth more than a fast quote over the phone.

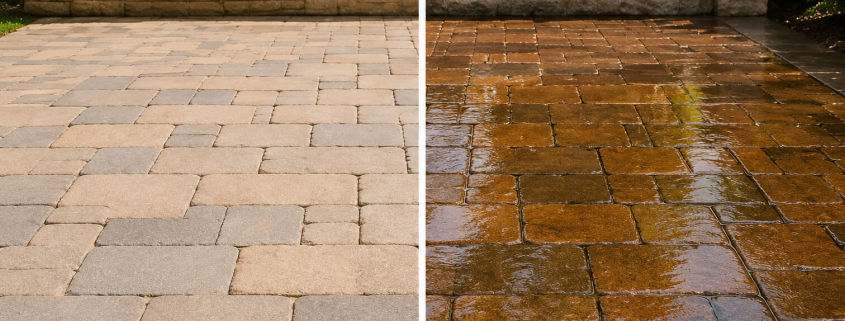
Side-by-side comparison of matte vs wet look paver sealer finish on a patio in Tampa, FL

ARTICLE

Matte or Wet Look Sealer: Which One Is Right for Your Pool Deck?

A practical guide to choosing between matte and wet look paver sealers for Florida pool decks, weighing slip resistance, UV stability, heat, and curb appeal.

Walk through any neighborhood in Clearwater or Wesley Chapel on a Saturday afternoon and you can spot the difference instantly: some pool decks glisten as if they were just rained on, while others have a soft, natural finish that almost disappears underfoot. Both looks come from a deliberate choice of sealer, and around a Florida pool that choice is about far more than appearance. Slip resistance, surface temperature, UV behavior, and how the finish ages through a rainy season all hinge on which product goes down. Here is how to think it through.

What the Two Finishes Actually Do

A matte (or “natural look”) sealer penetrates the paver and leaves little to no surface film. The stone keeps its original color and texture, and the finish reads as dry even when sealed. A wet look sealer, by contrast, forms a thin film on top of the paver that refracts light, deepens pigment, and gives the surface that just-rinsed shine.

Both products do the core job of a sealer: they lock joint sand in place, repel water and pool chemicals, slow weed and ant intrusion, and resist staining from sunscreen, leaves, and grilling. The difference is the surface they leave behind and how that surface behaves with bare feet, sunlight, and humidity.

Slip Resistance Around the Water

This is the first conversation we have with any homeowner in Lutz or Land O Lakes considering a wet look on a pool deck. Film-forming sealers, by their nature, are slicker when wet than penetrating sealers. A pool deck is wet almost by definition: splash-out, afternoon thunderstorms, dripping swimsuits, and pets shaking off.

That does not rule out wet look entirely. Quality wet look products can be blended with a fine polymer grit additive that restores traction without ruining the visual effect. But if traction is your top priority — especially with young kids or older family members using the deck — a matte penetrating sealer is the safer default. The texture of the paver does the work, and the sealer stays out of the way.

Heat and the Florida Sun

Surface temperature is the second factor most homeowners underestimate. A glossy, darker-reading finish absorbs more solar radiation than a matte one. On a July afternoon in Brandon, a wet-look-sealed travertine or charcoal paver can run noticeably hotter underfoot than the same paver sealed matte.

If your pavers are light in color to begin with, the heat penalty of a wet look is modest. If they are a deep brown, gray, or red blend, matte will keep the deck more comfortable for bare feet between May and October. This is a real-world consideration, not a marketing one.

UV Stability and How Each Finish Ages

Florida UV is punishing on any coating. Cheap wet look sealers, particularly solvent-based acrylics, can yellow, cloud, or develop a white haze (often misdiagnosed as efflorescence) when moisture gets trapped under the film during our rainy season. When that happens, the only fix is a chemical strip and reseal, which is not a small job.

Modern water-based wet look sealers with UV inhibitors perform far better, but they still demand a properly dried paver and correct application conditions. Matte penetrating sealers sidestep most of these failure modes because there is no film to cloud or peel. They wear by gradually thinning rather than by visibly failing, which generally means a simpler reapplication two to four years down the road.

Efflorescence, Humidity, and Timing

Any sealer applied over a damp paver in a humid environment is asking for trouble, but wet look products are less forgiving. Trapped moisture beneath the film produces the milky blush that homeowners often mistake for a defect in the paver itself. In Pinellas County, where afternoon humidity rarely drops below sixty percent even on “dry” days, the moisture window for sealing is narrower than most homeowners expect.

Matte sealers breathe more readily, allowing residual moisture to escape through the surface. That tolerance does not mean you can seal in the rain, but it does mean a slightly damp paver is less likely to ruin the job. For coastal properties in St. Petersburg dealing with salt air, breathability also helps the paver shed dissolved salts rather than trapping them under a film.

Matching the Finish to How You Use the Deck

Aesthetics still matter, and there are pool decks where a wet look is the right answer. A travertine deck used mostly for entertaining, with a covered lanai and shaded seating, can carry a wet look beautifully and benefit from the color depth. A tumbled-paver deck around an active family pool, fully exposed to the sun, is almost always better served by a matte or low-sheen finish.

A middle path worth knowing about is a semi-gloss or “color-enhancing” matte. These penetrating products deepen the paver color the way a wet look does, without leaving a reflective film. For many Tampa Bay homeowners, that combination — richer color, no glare, full slip resistance — turns out to be the finish they actually wanted all along.

A Practical Next Step

Before committing to a finish, request a sample application on a small, out-of-the-way section of your existing deck, ideally in both a shaded and a sun-exposed area. Wet it down, walk on it barefoot at midday, and look at it after a rainstorm. Twenty-four hours of real-world observation will tell you more than any product brochure. From there, a professional assessment of your paver type, deck orientation, and drainage will narrow the product choice to one or two sealers genuinely suited to your specific deck and the climate it has to live in.

Close-up of gray pavers with visible efflorescence white mineral deposits, common on Florida hardscapes in humid Tampa Bay climate.

ARTICLE

What Efflorescence Really Is and How to Get Rid of It in Florida's Humidity

A practical guide to the white haze that appears on Florida pavers each summer—what causes it, why humidity makes it worse, and the correct treatment sequence before sealing.

If you own a paver driveway, patio, or pool deck in the Tampa Bay area, you have probably noticed a chalky white film that seems to bloom across the surface overnight, usually after a stretch of heavy rain. It is not mold, it is not damage from a cleaner, and it is not something your installer did wrong. It is efflorescence, and in Florida’s climate it is almost unavoidable. Understanding what it is—and how to treat it correctly before sealing—will save you money and prevent a much bigger problem down the line.

What Efflorescence Actually Is

Efflorescence is a deposit of soluble salts, primarily calcium hydroxide and calcium carbonate, that migrates from inside concrete pavers to the surface. Every concrete paver contains cement, and cement contains lime. When moisture moves through the paver, it dissolves these minerals and carries them upward. Once that moisture reaches the surface and evaporates, the minerals are left behind as a white, powdery haze.

The process is purely chemical and physical. It has nothing to do with the quality of the paver or the skill of the installer. In fact, brand-new pavers are often the most prone to efflorescence because they contain the highest concentration of unreacted lime.

Why Florida’s Humidity Makes It Worse

In drier climates, efflorescence typically shows up once, fades within a season, and rarely returns. Florida is a different story. The Tampa Bay area combines high ambient humidity, a long rainy season, frequent afternoon thunderstorms, and warm ground temperatures that keep the base layer beneath your pavers consistently damp. That moisture has nowhere to go but up.

Homeowners in Wesley Chapel and Land O Lakes often see efflorescence return in waves throughout the summer because each rain event resets the cycle—water enters the joints, dissolves more minerals from inside the paver, and deposits them on the surface as it evaporates. Coastal properties in Clearwater and St. Petersburg add another variable: salt-laden air that can interact with surface minerals and intensify the visible haze.

Why You Cannot Just Pressure Wash It Away

The first instinct is usually to grab a pressure washer or a stiff brush and scrub. This rarely works, and it often makes the problem worse. Calcium carbonate is not water-soluble. Plain water will move it around, push it deeper into the joints, or temporarily mask it, but the deposits will reappear within days once the surface dries.

Worse, aggressive pressure washing on pavers that already have efflorescence can erode the cement paste at the surface, opening up more pathways for future mineral migration. The pavers end up looking duller and more porous than they did before.

The Correct Treatment Sequence

Removing efflorescence properly requires a mild acid-based cleaner formulated specifically for concrete pavers. These products dissolve the calcium deposits chemically rather than relying on mechanical force. The paver surface must be pre-wetted so the acid does not penetrate too deeply, the cleaner is applied at the manufacturer’s dilution, allowed a short dwell time, agitated lightly, and then thoroughly neutralized and rinsed.

Timing matters. Efflorescence treatment should be done after the pavers have had enough time to release their initial flush of minerals—typically 60 to 90 days after installation for new work—and during a window of dry weather. Treating a paver surface the day before a thunderstorm is a wasted effort, because fresh moisture will simply trigger another bloom.

Why Sealing Comes After, Not Before

This is the step most homeowners and many contractors get wrong. Sealing pavers that still have active efflorescence locks the white haze in permanently. The sealer forms a film over the deposits, and no amount of cleaning afterward will reach them without stripping the sealer entirely—an expensive process.

The correct order is always: clean, treat efflorescence, allow the surface to fully dry, then seal. A breathable, properly chosen sealer designed for Florida’s humidity will actually slow future efflorescence by reducing how much water enters the paver in the first place. The wrong sealer—or one applied to a damp surface—can trap moisture underneath and cause cloudy white blushing that looks similar to efflorescence but is much harder to fix.

When Efflorescence Signals a Bigger Problem

Occasional summer efflorescence is normal. Persistent, heavy efflorescence that returns season after season often points to a drainage issue beneath the pavers. If the base layer is holding water because of poor grading, a failed bedding layer, or runoff from a downspout, the pavers will keep wicking moisture and minerals indefinitely.

In neighborhoods around Brandon and Lutz where clay-heavy soils are common, drainage problems are a frequent culprit. In those cases, treating the surface is only half the answer—the underlying water path needs to be corrected as well.

A Practical Next Step

If you are seeing white haze on your pavers right now, resist the urge to scrub it or seal over it. Take a few clear photos in good light, note when it first appeared and whether it follows rain events, and check whether the affected area sits near a downspout or low spot. That information will tell a qualified paver specialist whether you are dealing with normal seasonal efflorescence or a drainage issue that needs correction first. From there, a proper clean, treat, and seal sequence—done in a dry weather window—will restore the surface and give you years of cleaner, more stable results.

Close-up of paver joints with sand loss, ants, and weed growth — signs joint sand needs replacement before Tampa's rainy season

ARTICLE

How to Tell If Your Paver Joints Need New Sand Before the Rainy Season

A practical inspection guide for Wesley Chapel and Land O Lakes homeowners to spot failing polymeric sand before summer storms wash it out, plus when to call in sand joint stabilization.

Florida’s rainy season has a way of finding every weak point in an outdoor surface, and paver joints are usually the first to give. The sand packed between each stone does more than fill a gap. It locks the field together, sheds water, and keeps insects and weeds from setting up shop underneath. By the time the afternoon thunderstorms start rolling through Wesley Chapel and Land O Lakes in June, joints that were already crumbling can disappear in a single heavy downpour. The good news is that failing joint sand gives off clear warning signs weeks or months before things get serious.

Why Joint Sand Fails Faster in Central Florida

Polymeric sand is engineered to harden when activated with water, creating a flexible seal between pavers. In a dry climate, a quality install can last seven to ten years. In Tampa Bay, the combination of daily humidity, intense UV, soft ground movement, and torrential summer rain shortens that window considerably. Most installations show measurable wear at the four-to-six-year mark.

Salt air near the coast accelerates the breakdown further, which is why pool decks in Clearwater and St. Petersburg tend to need attention sooner than inland driveways. Recognizing the early symptoms is the difference between a routine refresh and a full restoration.

Sign One: Crumbling or Powdery Joints

Run a screwdriver or the corner of a key along a joint. Healthy polymeric sand should feel firm and resist gouging. If the surface flakes away easily, sheds a fine dust, or sits noticeably below the top of the pavers, the binder has broken down. At that point the sand is functioning more like loose beach fill than a stabilizer.

Pay closest attention to joints near downspouts, the low edge of a driveway, and the perimeter of a pool deck. These are the first zones to fail because they take on the most water volume.

Sign Two: Ant Hills and Insect Activity

Small mounds of fine sand on top of your pavers are a giveaway. Ghost ants, sugar ants, and the ever-present Florida fire ant will excavate any joint that has lost its rigidity, pushing displaced sand to the surface as they tunnel. Each mound represents a void underneath the paver.

Those voids matter. They collect water during a storm, soften the bedding layer, and eventually let the pavers shift. What looks like a pest problem is really a structural warning.

Sign Three: Pavers That Rock or Sit Unevenly

Walk the surface barefoot or in flat shoes and pay attention to any stone that wobbles, tips, or clicks against its neighbor. Joint sand provides lateral support. Once it washes out, individual pavers lose the friction that holds them in place and start to settle independently.

A driveway with three or four rocking pavers near the apron is still a maintenance job. A patio where a dozen stones are loose has crossed into restoration territory and should be addressed before water reaches the base layer.

Sign Four: Weeds, Moss, and Algae in the Seams

Weeds growing out of paver joints are not sprouting from the sand itself. Wind-blown seeds land on the surface and germinate wherever they find moisture and a foothold. Intact polymeric sand denies them both. When you start pulling crabgrass, dollarweed, or spurge out of the joints every couple of weeks, the seal is gone.

The same applies to the green or black film that appears on shaded patios in Lutz and Brandon. Algae needs standing moisture, and joints that drain properly rarely stay wet long enough to support it.

Sign Five: Visible Washout After a Storm

After the next heavy rain, take a walk around the hardscape before the surface dries. Look for sand fans trailing across the pavers, sand collected in the grass at the edges, or sediment streaks running toward the lawn or pool cage. Any of these tells you that the joints are actively releasing material every time it rains.

This is the symptom that turns urgent fastest. Once washout begins, each storm removes a little more, and the bedding sand under the pavers eventually goes with it.

What Sand Joint Stabilization Actually Involves

Proper sand joint stabilization is more than sweeping new product into the gaps. The existing degraded sand has to be removed to a consistent depth, the joints cleaned and dried, and fresh polymeric sand installed and activated under controlled conditions. Humidity, temperature, and the timing of the water activation all affect whether the binder cures correctly. A rushed job in the wrong weather window often fails within a season.

In many cases, stabilization is paired with a fresh sealer application. The sealer locks the top layer of sand, repels oil and rust, and slows UV breakdown, extending the service life of both the joints and the pavers themselves.

Your Next Step Before the Storms Arrive

Spend fifteen minutes this weekend walking your driveway, patio, or pool deck with the five signs above in mind. If you find one or two early indicators, you likely have time to schedule professional joint stabilization before the rainy season hits its peak. If you are already seeing washout, rocking pavers, or active ant tunneling, the work should move up your list. A short inspection now is far less expensive than rebuilding a section of base in August, and it keeps the hardscape you invested in performing the way it was designed to.

Before and after paver sealing on a Tampa Bay pool deck showing weather damage restored to like-new condition

ARTICLE

Why June Rain Is the Worst Thing for Unsealed Pavers in Tampa Bay

Florida’s rainy season puts unsealed pavers at serious risk. Here’s how June downpours accelerate erosion, joint washout, and efflorescence—and what to do before the worst months hit.

Every year around the first week of June, Tampa Bay homeowners get a familiar reminder that the dry spring is over. The afternoon clouds build, the thunder rolls in from the Gulf, and within an hour a driveway can be sitting under a quarter inch of moving water. For pavers that haven’t been sealed—or that were sealed years ago and never touched again—those storms are doing more damage than most owners realize.

What Actually Happens to Pavers in a Florida Downpour

A typical June storm in Hillsborough or Pinellas County can drop one to three inches of rain in under an hour. That water doesn’t just run off the surface. It hits the joints between pavers, percolates down through the polymeric or silica sand, and pulls fine material with it as it goes. Over a single rainy season, repeated storms can flush a measurable percentage of jointing sand right out from between the stones.

Once the joints lose sand, the pavers lose their mechanical lock. They begin to shift under vehicle weight, rock underfoot, and open small gaps where weeds, ants, and more water find their way in. The cycle accelerates from there.

Joint Washout: The Damage You Can See

Joint washout is the most visible consequence of unsealed pavers in the rainy season. After a few heavy storms, homeowners in Wesley Chapel and Lutz often notice dark lines forming between stones, low spots near downspouts, and small piles of sand collecting at the edge of the driveway or at the bottom of a pool deck slope.

That sand is the structural glue holding the surface together. A properly sealed paver system uses a stabilized joint sand that bonds when activated and then locked in by the sealer. Unsealed joints have nothing holding them in place except gravity and friction, and a Florida thunderstorm overwhelms both.

Efflorescence Bloom in High Humidity

The second problem is less obvious but harder to fix once it sets in. Efflorescence is the white, chalky haze that appears on concrete pavers when moisture inside the stone migrates to the surface and deposits mineral salts as it evaporates. Florida’s combination of saturated ground, high humidity, and intense sun creates close to ideal conditions for it.

Unsealed pavers absorb water from below during every storm and then bake in 90-degree heat the next morning. That evaporation cycle pulls calcium hydroxide to the surface day after day. By August, a driveway that looked clean in May can have a permanent-looking white film across half its surface.

Erosion of the Base and Edge Restraints

Beyond the surface, rainy season storms attack the base layer underneath the pavers. In coastal areas like Clearwater and St. Petersburg, sandy soils drain quickly but also shift easily. When water finds its way past unsealed joints and into the bedding sand, it can hollow out small voids and undermine edge restraints.

This is how driveways start to develop dips near the apron, and how pool deck pavers begin to settle unevenly against the coping. Once the base is compromised, sealing alone won’t fix it—the affected area has to be lifted, re-leveled, and reset before any restoration work can hold.

Why Timing Matters More Than Most Homeowners Think

Sealing isn’t a project that does well when it’s rushed into between storms. A proper application requires the pavers to be fully cleaned, any failed joint sand replaced, and the surface dry enough for the sealer to penetrate and cure. In Tampa Bay’s summer, finding a clean 48-hour window gets harder every week from June through September.

Homeowners who wait until July or August to call often end up scheduling into the fall, which means the pavers go through the worst three months of the year unprotected. The damage that accumulates during that stretch—sand loss, efflorescence, weed growth, minor settling—then has to be addressed as restoration work before sealing can even begin, which adds cost and time.

Salt Air, Pool Chemistry, and the Coastal Factor

For homeowners closer to the water, there’s an additional layer. Salt-laden air accelerates the breakdown of unsealed concrete pavers, and pool decks get a regular dose of chlorinated splash-out that wears at the surface over time. A good penetrating sealer creates a barrier that slows both of those processes considerably.

In Brandon and inland Pasco County, the salt-air issue is minimal, but the rainfall totals are often higher than the coast. Every part of Tampa Bay has its own version of the problem; the underlying solution—sealing on a regular schedule—is the same.

What to Do Before the Heaviest Months Hit

If your pavers haven’t been sealed in the last two to three years, or if you’re noticing any sand loss, white haze, or weed growth in the joints, the practical next step is a quick assessment before the rainy season hits its peak. A professional walk-through can tell you whether you need a full restoration and reseal, a maintenance coat, or just joint stabilization.

The goal isn’t to sell every homeowner on the most expensive option. It’s to get your hardscape protected before the storms that are already on the forecast do damage that takes far more work to undo. Schedule the evaluation now, and you’ll have time to do the job right while the weather still cooperates.

freshly sealed brick paver driveway at Florida home

Driveway pavers are one of the most attractive features of many homes in Lutz and Land O’ Lakes, but Florida’s climate can slowly wear them down over time. Heat, humidity, and frequent rainfall place constant stress on outdoor paver surfaces, especially on driveways and patios that receive daily exposure to the elements.

Without proper maintenance, pavers may begin to fade, develop weeds between the joints, or lose the sand that helps keep the surface stable. These small changes often appear gradually, which is why many homeowners first notice them when the driveway begins to look dull or uneven.

Professional paver sealing helps protect driveway and patio surfaces from these environmental conditions while preserving the natural color of brick pavers.


Why Florida Climate Impacts Paver Surfaces

Florida’s combination of humidity, rainfall, and strong sunlight creates conditions that accelerate surface wear on outdoor materials. Over time, moisture can penetrate unsealed pavers, weakening their protective surface and allowing stains, algae, or mildew to develop.

According to 👉 Tampa Bay regional climate data , the Tampa Bay region experiences high humidity levels and frequent rainfall throughout the year. These conditions contribute to gradual erosion of joint sand and surface fading on outdoor paver installations.

Once moisture begins affecting the surface, homeowners may begin noticing:

• fading or dull paver color

• weeds appearing between paver joints

• sand washing out from between bricks

• uneven areas beginning to form on driveways

Regular maintenance helps reduce these issues before they lead to larger structural problems.


How Paver Sealing Protects Driveways and Patios

Professional sealing helps create a protective barrier across the surface of the pavers. This barrier helps resist moisture penetration, UV exposure, and staining from everyday use.

Many homeowners in Lutz and Land O’ Lakes choose sealing after their pavers are cleaned or restored because it helps maintain the appearance of the driveway or patio for longer periods.

Sealing can help:

• enhance the natural color of brick pavers

• reduce moisture absorption

• protect joint sand from erosion

• limit weed growth between pavers

• extend the lifespan of outdoor surfaces

Homeowners interested in protecting their driveway or patio surfaces often begin by learning about 👉 professional paver sealing services


Signs Your Pavers May Need Sealing

In many cases, the need for sealing becomes visible through changes in the appearance or stability of the pavers.

Common signs include:

• pavers losing their original color

• joint sand slowly disappearing

• small weeds appearing between pavers

• stains from dirt or organic material

• sections of the driveway beginning to shift

When these issues appear early, routine maintenance can help prevent more significant repairs later.

For homeowners unsure about the condition of their driveway or patio, it can help to 👉 schedule a professional paver inspection

to determine whether cleaning, restoration, or sealing may be recommended.


Protecting Paver Surfaces in Lutz and Land O’ Lakes

Outdoor paver installations are designed to last many years, but Florida weather can gradually impact their appearance and stability. Regular maintenance such as cleaning, restoration, and sealing helps homeowners protect their investment while keeping their driveway or patio looking clean and vibrant.

For homeowners throughout Lutz, Land O’ Lakes, and the surrounding Tampa Bay communities, maintaining sealed pavers can help preserve curb appeal and extend the life of outdoor living spaces.

freshly sealed brick paver driveway outside Florida home

Driveway pavers are built to last, but Florida’s climate creates conditions that gradually wear down even high-quality surfaces. Between intense sun, heavy rainfall, and constant humidity, pavers across Tampa Bay experience more environmental stress than in many other parts of the country.

Homeowners in Lutz, Land O’ Lakes, and Tampa often notice their driveway pavers beginning to fade, loosen, or develop weeds between the joints. These changes rarely happen overnight. Instead, they develop slowly as weather conditions break down the protective layers of the surface.

Understanding how Florida weather affects pavers helps homeowners know when it may be time for maintenance such as cleaning, restoration, or professional sealing.


Florida Humidity Weakens Paver Surfaces

Florida’s high humidity levels create constant moisture exposure for outdoor surfaces. Over time, moisture seeps into the porous surface of brick pavers and gradually breaks down their protective finish.

According to official climate data from 👉 Tampa Bay regional climate patterns , the Tampa Bay area experiences high humidity levels throughout most of the year.

This constant moisture exposure can lead to:

• gradual color fading

• surface wear

• buildup of algae or mildew

• weakening of the joint sand between pavers

Once moisture begins penetrating the surface, pavers become more vulnerable to stains and deterioration.


Heavy Rain Slowly Washes Away Joint Sand

The sand between pavers plays a critical role in keeping the surface stable. Joint sand helps lock the pavers together and prevents them from shifting under pressure.

However, Florida’s frequent storms can gradually wash this sand away.

As joint sand disappears, homeowners may begin noticing:

• weeds growing between pavers

• shifting or uneven driveway sections

• small gaps forming between pavers

According to research from 👉 Florida State University’s climate resources , Florida receives significantly higher rainfall than many other regions of the United States.

Without maintenance, this rainfall can slowly weaken the structural stability of driveway and patio paver systems.


Sun Exposure Causes Color Fading

Florida’s strong sunlight is another factor that impacts driveway pavers. Constant UV exposure slowly fades the natural color of brick pavers, especially on surfaces like driveways that receive direct sunlight for most of the day.

Over time, homeowners may notice:

• dull or faded paver color

• uneven discoloration

• loss of the original vibrancy of the surface

This is one of the most common reasons homeowners seek 👉 professional paver sealing services .

Sealing helps restore and protect the color of the pavers while adding a protective barrier against UV damage.


Why Maintenance Is Important for Florida Pavers

Regular maintenance helps protect driveway pavers from the combined effects of humidity, rain, and sun exposure.

Professional services such as cleaning, restoration, and sealing can help:

• stabilize loose pavers

• protect joint sand from erosion

• prevent weeds and algae growth

• restore the color of faded pavers

• extend the lifespan of driveway and patio surfaces

Homeowners across Lutz, Land O’ Lakes, and Tampa often choose sealing as a long-term protective step after pavers are cleaned and restored.

If pavers are already shifting or uneven, restoration may be recommended before sealing.

For homeowners unsure about the condition of their pavers, scheduling an inspection can help determine the best maintenance approach.

You can 👉 schedule a paver inspection with a local specialist to evaluate the condition of driveway or patio surfaces.


Protecting Your Driveway Pavers Long Term

Florida weather will always impact outdoor surfaces, but proper maintenance helps prevent small issues from becoming larger structural problems.

Driveway pavers that receive periodic cleaning, restoration, and sealing tend to maintain their appearance longer while resisting damage from moisture, sun exposure, and heavy rainfall.

For homeowners throughout Tampa Bay, Lutz, and Land O’ Lakes, maintaining paver surfaces helps protect both curb appeal and long-term property value.

Freshly sealed paver driveway outside a Florida home showing restored color and protective finish

Florida homeowners love paver driveways and patios because they combine durability with a clean, upscale appearance. However, Florida’s climate can be extremely tough on outdoor surfaces.

Between humidity, rainstorms, and intense sunlight, pavers slowly lose their protective surface over time. For homeowners in Lutz, Land O’ Lakes, and Tampa, understanding how often to seal pavers can help prevent long-term damage.


Why Florida Pavers Need Regular Sealing

Florida experiences heavy rainfall combined with year-round humidity. Moisture repeatedly enters and evaporates from the surface of pavers.

According to climate data from Florida weather trends , Florida ranks among the most humid states in the country, which accelerates wear on outdoor hardscape materials.

Without sealing, pavers may begin to show signs of deterioration such as fading, joint sand loss, and increased staining.


Typical Sealing Timeline

In Florida environments, pavers are commonly resealed every 2–3 years depending on several factors:

• Sun exposure

• Drainage conditions

• Traffic on the driveway

• Previous sealing quality

Homes with heavy sun exposure or high vehicle traffic may require sealing sooner.


Signs Your Pavers May Need Sealing

Many homeowners wait until the surface looks severely worn, but early signs appear much sooner.

Watch for these indicators:

• Faded or dull paver color

• Sand washing out of joints

• Increased weed growth

• Dark moisture spots on the surface

Addressing these issues early helps protect the structural stability of the driveway.

You can learn more about professional sealing services .


How Sealing Protects Pavers

Sealing creates a protective barrier that reduces water absorption and helps stabilize joint sand.

Benefits of sealing include:

• Protection from rain and moisture

• Restoration of paver color

• Reduced weed growth

• Longer surface lifespan

Research from the University of Florida IFAS Extension  highlights moisture management as a key factor in protecting outdoor surfaces.


Protecting Your Driveway Long-Term

Routine maintenance keeps paver driveways looking clean while protecting the structure beneath the surface.

Homeowners throughout Lutz, Land O’ Lakes, and Tampa often schedule sealing as part of a preventative maintenance plan to keep their driveways protected from Florida’s climate.

If your pavers are beginning to look faded or worn, you can schedule an inspection HERE  to de termine the best solution.

Freshly sealed paver driveway outside a Florida home showing restored color and protective finish