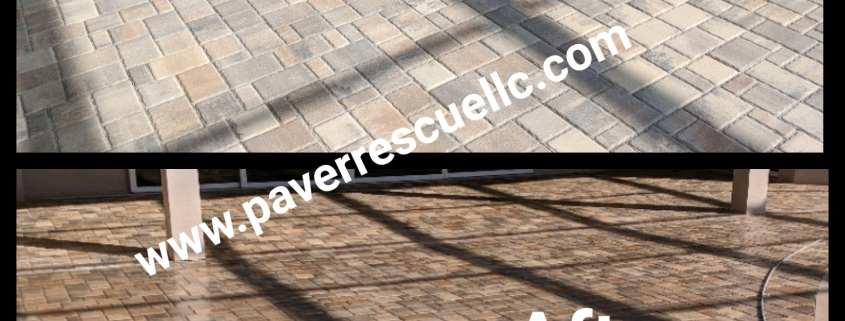
Close-up of paver joints on a Tampa FL patio showing sand erosion and gaps between pavers needing stabilization

ARTICLE

What Happens to Unstabilized Sand Joints During a Tampa Bay July

July’s storm cycles quietly hollow out unstabilized paver joints across Tampa Bay. Here’s what’s happening beneath the surface and why sand joint stabilization matters.

Every July, homeowners from Wesley Chapel to St. Petersburg watch afternoon thunderstorms roll in on an almost predictable schedule. The pavers look fine after each storm, and the driveway drains as it should. But underneath that surface calm, the sand between your pavers is quietly moving — and by the time the visible symptoms appear, joint failure is already well underway. Understanding what happens during a Tampa Bay July is the first step toward proper sand joint stabilization and preventing the shift, sinking, and weed growth that follow.

Why July Is the Hardest Month on Paver Joints

Tampa Bay’s rainy season peaks in July, when the region typically sees 15 to 20 measurable rain events in a single month. Many of those storms drop an inch or more of rain in under an hour. That intensity matters more than the total volume. A slow soaking rain lets water percolate; a July downpour creates sheet flow across driveways and patios, and sheet flow is what carries loose joint sand away.

Layer in the humidity that keeps joints damp between storms, and unstabilized sand rarely gets a chance to fully dry and lock together. It stays in a semi-saturated state where individual grains move easily under any hydraulic pressure.

The Mechanics of Joint Erosion

Polymeric or otherwise stabilized joint sand binds grain to grain, forming a semi-flexible matrix that resists water flow. Plain masonry sand does not. When runoff hits an unstabilized joint, water follows the path of least resistance — straight down into the joint, then laterally through the bedding layer.

Each storm removes a small amount of sand from the top of the joint and redistributes fines within the base. Over the course of a July, that adds up. Joints that started flush with the paver chamfer can drop a quarter inch or more in four to six weeks. Once joints fall below roughly two-thirds of the paver depth, the interlock that gives a paver system its structural strength begins to break down.

What Progressive Joint Loss Looks Like on Your Property

The earliest signs are easy to miss. You may notice a fine sand deposit at the low end of a Lutz driveway after a heavy storm, or a slight gritty film on a Clearwater pool deck. Weeds and ants find hollowed joints quickly because both need loose, moist substrate to establish. If you’re seeing new weed lines along joint seams in July when you weren’t in May, that’s joint sand loss, not a weed problem.

Later symptoms include individual pavers that rock underfoot, widening joint gaps, and pavers at driveway edges that begin to tilt outward. On patios and pool decks in Apollo Beach or other coastal areas, salt-laden humidity accelerates the surface breakdown of any remaining sand, compounding the issue.

Why the Base Matters as Much as the Surface

A paver system relies on three layers working together: the compacted base, the bedding sand, and the joint sand. Joint sand is not just a cosmetic filler. It transfers load between adjacent pavers, so a car tire rolling across a driveway distributes weight across many units rather than concentrating it on one.

When July rains wash joint sand into the bedding layer, they also carry fines deeper into the base. Over several rainy seasons, that migration can create voids beneath the pavers themselves. This is why a driveway in Brandon that looked level three summers ago may now show subtle dips near tire paths — the base has been quietly restructured by water.

How Sand Joint Stabilization Changes the Equation

Stabilization means treating the joint sand so that it resists water infiltration and holds its position under hydraulic pressure. The two common approaches are polymeric sand, installed as a replacement for existing joint material, and a penetrating joint stabilizer applied as part of a sealing project over sound existing sand.

Both approaches share the same goal: create a joint that sheds water at the surface rather than absorbing and channeling it. A properly stabilized joint will still get wet, but the sand grains stay locked together. That single change eliminates most of the erosion mechanism that a Tampa Bay July depends on.

Timing Matters in Florida

Stabilization work is climate sensitive. Polymeric sand needs a defined dry window to activate correctly, and joint stabilizers applied during sealing need surfaces that are genuinely dry, not just surface-dry after a morning shower. That’s why experienced Florida installers watch the radar as closely as the calendar and often schedule stabilization work in late spring before the daily storm pattern establishes, or in the drier stretches of fall.

Attempting stabilization mid-July is possible but requires tighter weather windows and more careful moisture management. Waiting until after the rainy season is often the more practical path, provided you’re not losing significant sand in the meantime.

A Practical Next Step

If you haven’t looked closely at your joints this summer, walk your driveway or patio after the next storm and check three things: joint depth relative to the paver surface, any sand deposits at drainage low points, and any new weed activity along seams. Those three observations will tell you whether your joints are holding or quietly failing.

If you’re seeing early signs, an on-site assessment can determine whether a full joint sand replacement, a stabilization treatment with sealing, or spot repairs make the most sense for your specific hardscape. Addressing joint loss before it reaches the base layer is significantly less expensive than rebuilding sections of a driveway or pool deck later.

Before and after paver sealing on a Tampa Bay pool deck, showing restored color and protected surface finish

ARTICLE

Why Mid-Summer Is the Hardest Time to Seal Pavers in Tampa Bay

July heat, humidity, and afternoon storms make mid-summer the trickiest season for paver sealing in Tampa Bay. Here’s what homeowners should realistically expect.

If you’ve been putting off sealing your driveway, patio, or pool deck until “later in the summer,” you’re not alone. But in Tampa Bay, mid-July through late August is arguably the most demanding stretch of the year to put sealer on the ground. The conditions that make our summers uncomfortable for people are the same conditions that make sealers behave unpredictably. Here’s what’s actually happening on your pavers in July, and what a realistic summer sealing appointment looks like.

The Humidity Problem Most Homeowners Underestimate

Paver sealers, whether water-based or solvent-based, need to release moisture and solvents into the air as they cure. When the ambient relative humidity in Wesley Chapel or Lutz sits at 85 to 95 percent for days on end, that evaporation slows dramatically. A sealer that would set up in two hours in April can stay tacky for six or eight hours in July, giving dust, pollen, insects, and lawn clippings plenty of time to embed themselves in the finish.

High humidity also raises the risk of blushing — that hazy, milky white film that appears when moisture gets trapped under the sealer film before it can fully cure. Once blushing sets in, the fix is rarely a quick touch-up. It usually means a chemical strip and a full reseal.

Afternoon Storms Rewrite the Schedule Daily

From mid-June through September, Tampa Bay averages an afternoon thunderstorm on roughly two out of every three days. That’s not a forecasting problem we can plan around — it’s the baseline. A sealer typically needs four to six hours of dry surface time after application before it can shed rain without damage. In practice, that means a crew starting at 8 a.m. in Brandon may be racing a 2 p.m. storm cell rolling in off the Gulf.

If rain hits a sealer that hasn’t cured, the result can be streaking, whitening, or pooled residue in the joints. On a pool deck in Clearwater, where the surface is often shaded and slow to dry, this window shrinks even further.

Surface Temperature Is Not the Same as Air Temperature

The weather app might say 91 degrees, but a south-facing paver driveway in St. Petersburg can easily read 140 to 150 degrees on an infrared thermometer by midday. Most manufacturers specify that sealer be applied to surfaces below roughly 90 to 95 degrees. Above that, the carrier flashes off too quickly, leaving the resin sitting on top of the paver instead of penetrating into it.

The result is a thin, uneven film that looks fine for a few weeks and then starts to peel, flake, or turn blotchy. This is one of the most common reasons homeowners call us to redo work that was done by someone else the previous summer.

Efflorescence Is More Active in the Wet Season

Efflorescence — the white, chalky mineral deposit that migrates to the surface of concrete pavers — is driven by moisture moving through the paver. During the rainy season, pavers stay damp far longer between showers, and that constant wet-dry cycling pushes more salts to the surface.

Sealing over active efflorescence traps those minerals under the finish, where they show up as permanent cloudiness. A responsible summer sealing job requires more aggressive cleaning and often a dedicated efflorescence treatment before any sealer touches the surface. That adds time and cost that a spring or fall job usually doesn’t require.

What a Realistic Summer Appointment Looks Like

None of this means paver sealing in Tampa is impossible in July or August. It means the process looks different. Expect your contractor to watch radar closely and possibly reschedule with short notice. Expect early morning starts, often between 7 and 8 a.m., to get ahead of both heat and storms. Expect that a job that takes one day in March may stretch across two or three visits in the summer as weather windows open and close.

You should also expect a more thorough surface prep conversation. If your pavers show any signs of efflorescence, moss, or embedded organic staining, a summer job may require a stripping and neutralizing step before the sealer goes down. Skipping that step to save time is how bad outcomes happen.

When It Makes Sense to Wait

For homeowners with flexibility, October through May is the more forgiving window in Hillsborough, Pasco, and Pinellas counties. Lower humidity, cooler surface temperatures, and predictable dry stretches let sealers cure the way their manufacturers designed them to. If your pavers are structurally sound and just look tired, waiting until fall is often the right call.

There are exceptions. If you’re preparing a property for sale, dealing with active weed growth in the joints, or trying to lock down loose sand before hurricane season peaks, a carefully managed summer application still makes sense. The key word is “managed.”

Your Next Step

Before you commit to a summer sealing date, walk your driveway or pool deck with an honest eye. Look for white haze, loose joint sand, hairline cracks, and any peeling from previous sealer. Take a few photos in bright morning light. Those images, along with the age of your pavers and whether they’ve ever been sealed before, give any reputable contractor in Tampa Bay enough information to tell you whether your project belongs on the July calendar or the November one. Getting that timing right is the single biggest factor in how long your next sealing job will last.

Side-by-side comparison of brick pavers and travertine pavers near a pool, showing different textures requiring different sealers in Florida

ARTICLE

Why Travertine Pavers in St. Petersburg Need a Different Sealer Than Clay or Concrete Pavers

Travertine is not concrete or clay. Here’s why St. Petersburg homeowners need a penetrating sealer designed for natural stone in Florida’s humid, coastal climate.

Travertine has become one of the most popular paver materials around St. Petersburg pool decks and patios, and for good reason: it stays cool underfoot, looks at home next to the water, and weathers into a soft, organic patina. But when it comes time to seal it, many homeowners assume the same product their neighbor used on a concrete paver driveway will work just fine. It won’t. Travertine is a fundamentally different material, and treating it like a concrete or clay paver is one of the most common reasons restoration work becomes necessary.

Travertine Is a Natural Stone, Not a Manufactured Paver

Concrete pavers are cast from cement, sand, and aggregate. Clay pavers are kiln-fired earth. Both are manufactured to fairly consistent densities and surface profiles. Travertine, on the other hand, is a sedimentary limestone formed by mineral springs over thousands of years. It arrives at your home full of natural voids, channels, and microscopic pockets that no factory created and no factory can eliminate.

That porosity is the whole story. Travertine breathes in a way that concrete and clay simply do not, and any sealer applied to it has to respect that fact or it will fail—sometimes spectacularly.

The Porosity Problem in a Humid Climate

St. Petersburg sits on a peninsula. Relative humidity routinely runs above 75 percent, afternoon thunderstorms soak the deck for half the year, and the water table is rarely far below the surface. Moisture in a Pinellas County paver installation isn’t an occasional event; it’s the baseline condition.

When a film-forming acrylic sealer—the standard “wet look” product used on concrete pavers—is applied to travertine, it traps that ambient moisture inside the stone. The sealer creates a plastic-like skin on top, but the water vapor migrating up from below has nowhere to go. The result is clouding, white blushing, peeling, and in worst cases, sealer that lifts off in sheets within a single rainy season.

The pH Factor Most Homeowners Never Hear About

There’s a chemistry issue most contractors gloss over. Travertine is calcium carbonate, which means it’s alkaline and reacts with acids. Concrete pavers are also alkaline but far denser and more chemically stable on the surface. Clay pavers are essentially inert.

This matters because many of the cleaning and prep chemicals used routinely on concrete pavers—muriatic acid washes, aggressive efflorescence removers, certain stripping agents—will etch travertine on contact, dulling the finish and opening the pores even further. A sealing program for travertine has to start with pH-neutral cleaning and stone-safe efflorescence treatment, or you’re sealing damage in place.

Why Penetrating Sealers Are the Right Call

The correct approach for travertine in Florida is a penetrating, breathable sealer—typically a silane, siloxane, or fluoropolymer chemistry, or a hybrid of those. Instead of forming a film on top of the stone, these products soak into the capillary structure and bond chemically with the calcium carbonate. They line the inside of the pores rather than capping them.

The practical effect is that water beads up and runs off the surface, but water vapor from below can still escape. Salt from pool splash-out and coastal air can’t migrate into the stone as easily, which dramatically reduces spalling and surface flaking. And because the sealer is inside the stone rather than on top of it, UV exposure from the Florida sun doesn’t degrade a visible film.

What You Give Up, and What You Gain

Homeowners coming from a concrete paver background sometimes miss the glossy “wet look” that film-forming sealers produce. Penetrating sealers on travertine generally leave a natural matte or low-sheen finish. Some products offer a slight color enhancement that deepens the cream and walnut tones without adding shine.

What you gain is durability that actually matches the lifespan of the stone. A properly applied penetrating sealer on travertine in the St. Petersburg area typically performs for three to five years before reapplication, with no peeling, no clouding, and no need to strip the old product off before resealing. That last point alone saves significant labor and chemical exposure on every maintenance cycle.

Salt Air, Pool Chemistry, and Hurricane Season

Coastal installations face conditions that inland pavers never see. Chlorinated or saltwater pool splash-out, airborne salt from the Gulf, and the cycle of saturation and rapid drying during hurricane season all stress the stone. A penetrating sealer helps in each case by reducing how much of that chemistry gets into the travertine in the first place.

It’s also worth noting that travertine, properly sealed, is less likely to harbor the algae and mildew that thrive in shaded, humid pool deck corners. The sealer doesn’t kill biological growth, but it makes the surface easier to clean and less hospitable for it to take hold.

Your Next Step

If you have travertine pavers around your home in St. Petersburg, Clearwater, or anywhere in Pinellas County, the first thing to do is find out what’s currently on them. Sprinkle a few drops of water on the surface. If the water beads tightly, you have an active sealer doing its job. If it soaks in within a few seconds, the stone is unprotected. If you see clouding, peeling, or a hazy film, you likely have a film-forming product failing on a stone that needed something different.

From there, a proper assessment—pH-neutral test cleaning in an inconspicuous area, moisture reading, and a look at joint condition—will tell you whether you’re looking at a fresh seal, a strip-and-reseal, or a full restoration. Get that diagnosis before any product goes down, and your travertine will reward you with decades of service in one of the most demanding climates in the country.

Before and after paver restoration showing faded, worn pavers transformed to vibrant color at a Tampa Bay Florida home

ARTICLE

How to Read the Warning Signs That Your Lutz Paver Driveway Needs Restoration, Not Just a Reseal

Sealer can refresh a tired paver driveway, but only if the foundation underneath is still sound. Here’s how Lutz homeowners can spot the red flags that signal a full restoration is needed first.

Every few years, a paver driveway starts to look its age. The color fades, weeds creep into the joints, and the surface picks up tire marks from the daily routine. Most homeowners assume a fresh coat of sealer will solve it. Sometimes that’s true. But in Lutz and the rest of Tampa Bay, where heavy rain, sandy base material, and year-round humidity work against hardscapes, sealer applied over a failing driveway is money poured down the drain. Knowing the difference between cosmetic wear and structural failure is the single most important judgment call a homeowner can make before scheduling any service.

Why Sealing Alone Won’t Fix Structural Problems

Sealer is a surface treatment. It locks down joint sand, deepens color, blocks stains, and slows the growth of mold and mildew. What it does not do is correct movement, level a sunken section, or restore a compromised base. If the substrate beneath your pavers has shifted, washed out, or settled unevenly, sealing the top is the equivalent of painting over a cracked wall — the underlying problem keeps progressing, and now it’s locked under a glossy finish.

In Florida, the gap between “needs a reseal” and “needs a restoration” can close quickly. A driveway that looked fine last spring can fail in earnest after one hurricane season of saturated soil and runoff. The signs below are worth a careful walk-through before you commit to any maintenance plan.

Rocking, Wobbling, and Loose Units

Step slowly across your driveway and pay attention to what happens under your weight. A properly installed paver should feel locked in place. If individual units rock, tilt, or shift — even slightly — the bedding sand beneath them has eroded or the base has lost its compaction. This is one of the clearest indicators that paver installation in Lutz needs to be partially or fully redone, not simply resealed.

Rocking units almost always get worse. Each time a vehicle rolls over a loose paver, it pumps more sand out of the joint and accelerates the failure of the surrounding units. Sealing on top of this will not stabilize anything. The pavers must be pulled, the base re-graded and re-compacted, and the bedding layer restored before any topical product is applied.

Hollow Spots and Sunken Sections

Tap a few suspect pavers with a hammer handle or the toe of a boot. A solid unit sounds dull and tight. A hollow tap, almost like knocking on a drum, means there’s a void underneath. Voids in Tampa Bay driveways usually come from one of two sources: water washing out the sand base over time, or improper compaction during the original installation. Both are restoration problems, not sealing problems.

Sunken areas are the visible version of the same issue. If you see a dip near the apron, along the garage threshold, or anywhere water tends to pool after a storm, the base has likely lost material. Left alone, the depression grows, the surrounding pavers begin to slope inward, and the joints widen. Restoration at this stage is straightforward. Wait another two rainy seasons and it becomes a much larger project.

Advanced Efflorescence and Deep Staining

A light, chalky haze on new pavers is normal efflorescence — mineral salts working their way to the surface. It typically clears with time or a mild cleaner. What you’re looking for is the advanced version: thick white crusting that returns no matter how many times it’s washed, or rust-colored bleed lines from irrigation water and fertilizer that have soaked deep into the paver body.

When staining penetrates beyond the surface, sealing traps it in place. Worse, applying sealer over heavy efflorescence can cause the new coating to cloud or peel as moisture continues pushing through from below. A proper restoration includes a deep acid wash or stripping treatment, full drying time, and only then a fresh sealer. Skipping that sequence in Florida’s humidity is one of the most common reasons homeowners end up with a milky, hazy driveway six months after a “professional” seal job.

Joint Sand Loss and Spreading Pavers

Look down at the joints between your pavers. If the sand sits well below the chamfered edge, if you can see daylight between units, or if weeds and ants have established themselves in the gaps, the interlock that holds the entire system together is compromised. Pavers rely on each unit pressing against its neighbors. Once that lateral pressure is lost, the field begins to spread, edges drift, and the driveway loses its geometry.

Polymeric sand can sometimes be reinstalled without lifting the pavers, but only if the base is still sound and the spread is minor. Widespread joint failure, especially combined with any of the signs above, points toward restoration: lifting the affected area, resetting units, and rebuilding the joints from the bottom up.

Edge Failure and Cracked Border Units

The perimeter of a driveway is where most paver systems fail first. Check your edge restraints — the plastic, metal, or concrete bond beam that holds the outer row in place. If the border pavers are tipping outward, separating from the field, or sitting on exposed soil, the restraint has failed. Cracked or chipped border units are another sign that the edge is taking stress it was never meant to handle.

Edge problems spread inward. A failed restraint along one section of a Lutz driveway will, within a couple of seasons, pull the adjacent rows out of alignment. This is restoration territory, not maintenance, and it should be addressed before resealing.

Your Practical Next Step

Before you schedule any sealing service this year, take fifteen minutes to walk your driveway with this list in mind. Test for rocking, listen for hollow taps, look closely at the joints and edges, and note any staining that hasn’t responded to normal cleaning. If you find one or two minor issues, a quality reseal with fresh joint sand is probably enough. If you find several — or any structural movement — ask for a restoration assessment before a single drop of sealer goes down. A short, honest inspection now protects the investment you’ve already made in your hardscape and saves you from paying twice for work that should have been done in the right order.

Before and after paver restoration on a Florida pool deck patio, showing renewed color and sealed surface in Tampa Bay area

ARTICLE

What Salt Air Actually Does to Sealed Pavers on a Pinellas County Patio

Coastal Pinellas homes face a different paver maintenance reality than inland Tampa. Here’s how salt air degrades sealers and joint sand, and what to do about it.

If you own a paver patio in Clearwater, Indian Rocks Beach, or anywhere within a mile or two of the Gulf, you’ve probably noticed your hardscape ages differently than a friend’s place in Brandon or Wesley Chapel. The sealer dulls faster. The joint sand seems to disappear after a single storm season. You’re not imagining it. Salt air is a quiet, persistent accelerant on coastal Pinellas patios, and it changes the maintenance equation in ways most homeowners never hear about until the damage is visible.

The Coastal Variable Most Homeowners Overlook

Florida’s humidity and rainy season are the headline challenges for paver restoration in Tampa Bay, but coastal properties face a third factor that inland homes simply do not: airborne salt. The Gulf breeze carries microscopic salt aerosols inland for miles, and they settle on every horizontal surface, including your pavers, your sealer, and the sand between the joints.

Studies on coastal building materials generally agree that meaningful salt deposition extends roughly half a mile to a mile inland, with measurable effects out to three miles depending on prevailing winds. In practical terms, that covers most of Pinellas County’s western corridor and a good portion of St. Petersburg.

How Salt Ions Break Down Sealer Bonds

Paver sealers, whether solvent-based acrylics or water-based urethanes, work by forming a thin film that bonds to the surface of the concrete or clay paver. That bond is chemical, not just physical. Chloride ions from salt air are aggressive little molecules. They migrate into microscopic pores in the sealer, attract moisture, and slowly disrupt the adhesion between the sealer and the paver substrate.

The result is the haze, peeling, or “milky” patches coastal homeowners often blame on rain or pool splash. Rain accelerates the process by carrying salt deeper into the surface, but the salt itself is doing the structural damage. A sealer that lasts three to five years inland may need attention in two to three years on a beachfront patio.

Why Joint Sand Disappears Faster Near the Gulf

Polymeric joint sand relies on a binder that activates with water and cures into a flexible, semi-rigid filler. That binder is sensitive to repeated salt exposure. Salt crystals expand and contract with humidity cycles, creating micro-fractures in the cured joint. Once those fractures open, the next heavy rain or pressure-washer pass flushes sand out far more easily than it would on an inland patio.

Homeowners in places like Belleair, Madeira Beach, or the St. Pete waterfront often find themselves topping off joint sand every two years instead of every four or five. If the sand is washing out unevenly — deeper in some joints than others — that’s usually a sign salt-driven degradation is at work, not a faulty installation.

The Efflorescence Confusion

Coastal paver owners frequently mistake salt deposits for efflorescence, the white calcium haze that rises out of curing concrete pavers. They look similar, but they behave differently. Efflorescence is internal to the paver and typically resolves within the first year or two with proper cleaning. Salt bloom, by contrast, is external and recurring. It comes back every dry stretch after a humid spell, because the salt source is the air itself.

Treating recurring salt bloom with standard efflorescence cleaner will lift the visible deposit but won’t stop it from returning. Long-term management requires a sealer system designed for chloride resistance and a regular rinse routine, particularly before and after named storms when wind-driven salt deposition spikes.

How Coastal Maintenance Differs from Inland Tampa

An inland patio in Lutz or Land O Lakes lives in a more forgiving environment. The primary stressors are UV, humidity, mildew, and the occasional tropical downpour. A standard reseal every three to five years, combined with periodic cleaning, keeps things looking sharp.

A Pinellas coastal patio needs a different rhythm. Plan on rinsing the surface with fresh water every few weeks during dry, breezy stretches when salt accumulates without being washed off naturally. Schedule professional inspection of the sealer every 18 to 24 months rather than waiting for visible failure. And when it’s time to reseal, ask specifically about chloride-resistant or marine-grade sealer chemistries, which perform measurably better in coastal conditions than the standard products used a few miles inland.

Storm Season Adds Another Layer

Hurricane and tropical storm seasons concentrate salt deposition into short, intense events. A single named storm can drive Gulf salt several miles farther inland than usual, coating patios in Seminole, Largo, and even parts of central Pinellas with a salt load that would normally take months to accumulate. Rinsing the patio with fresh water within a day or two of a storm passing is one of the simplest and most effective protective steps a coastal homeowner can take.

If a sealer is already near the end of its service life when a storm hits, that single event can push it past the point where a simple reseal will work. Restoration — including stripping the old sealer, rebuilding joints, and starting fresh — becomes the only option.

What to Do Next

If your patio sits within a few miles of the Gulf and you haven’t had the sealer evaluated in the last two years, that’s the place to start. Look closely at the joints, the sealer sheen, and any white residue that returns after cleaning. Document what you see with a few photos in different light. A professional assessment can tell you whether you’re looking at routine maintenance, a targeted reseal, or full paver restoration. Catching salt-driven degradation early is dramatically less expensive than rebuilding a patio that’s been allowed to deteriorate through several storm seasons.

Sealed paver driveway glistening in heavy Florida rain, showing hurricane-season readiness for Pasco County homeowners

ARTICLE

Hurricane Season Is Here: How Pasco County Homeowners Should Prep Their Paver Hardscapes Now

A practical pre-storm checklist for Pasco County homeowners covering joint stability, sealer integrity, and drainage slope so paver driveways, patios, and pool decks survive hurricane season intact.

Hurricane season in Florida runs from June through November, and for homeowners in Land O’ Lakes, Wesley Chapel, and the rest of Pasco County, that window covers the wettest, windiest, and most punishing months of the year for outdoor hardscapes. A paver driveway or pool deck is a significant investment, and most of the damage a storm causes is preventable with a few hours of focused prep work. Hurricane-prep paver care is less about reacting after the wind dies down and more about handling the small problems before a storm magnifies them.

Why Pasco County Pavers Are Especially Vulnerable

Pasco County sits in a stretch of the Tampa Bay region where flat terrain, high water tables, and sandy soils create slow-draining conditions during heavy rain. Pavers installed over a properly compacted base can handle ordinary Florida downpours, but a tropical system can dump six to ten inches of rain in a day, saturate the base layer, and push joint sand out from between the stones.

Add 70 to 100 mph winds carrying patio furniture, palm fronds, and roof debris, and you have the two main threats to any paver surface: hydraulic pressure from below and impact damage from above. Both are manageable if the hardscape is in good condition going into the storm.

Check Joint Sand and Polymeric Stability

The sand between your pavers is what locks the system together. When joints are full and stable, the surface behaves like a single flexible slab. When joints are washed out or cracked, individual pavers begin to shift, and a storm will accelerate that movement dramatically.

Walk the entire surface and look for low spots in the joints, visible cracking in polymeric sand, or any paver that rocks under foot pressure. Pay close attention to the perimeter, around pool coping, and along driveway edges where edge restraint failures usually begin. If you can see more than a quarter inch of depth missing from the joints, the surface needs to be refilled and reactivated before the next system rolls in.

Inspect Sealer Integrity Before the Rain Returns

A properly applied sealer does two jobs that matter during hurricane season: it binds the joint sand against water intrusion, and it sheds rainwater rather than letting it soak into the paver itself. In our humid climate, sealers typically need refreshing every two to four years depending on sun exposure and traffic.

Look for dull patches, white hazing (a sign of trapped moisture or efflorescence), or areas where water no longer beads on the surface. If rain is absorbing into the pavers rather than running off, the sealer has aged out and the joint sand is no longer protected. Resealing before peak storm activity in August and September is one of the highest-value prep steps a homeowner can take.

Confirm Drainage Slope and Clear the Path

Every paver installation should be pitched to move water away from the house and toward a yard, drain, or swale. Over years of settling, that slope can flatten or reverse, especially near downspout outlets and pool decks. Run a garden hose at the high point and watch where the water actually goes. If it pools against the foundation, around pool equipment, or in the middle of the driveway, that low spot will become a small pond during a tropical storm.

Also check that gutters, downspouts, and any French drains tied into the hardscape are clear of debris. A blocked downspout dumping directly onto pavers during a hurricane is one of the fastest ways to blow out joint sand and undermine the base.

Secure What Sits on Top of the Pavers

Most post-storm paver damage we see in Wesley Chapel and Lutz is not from the wind itself—it is from objects the wind moved. Patio furniture, grills, planters, and pool accessories become projectiles, and when they land on a paver surface they chip corners, crack faces, and gouge sealer.

Before a named storm approaches, move lightweight furniture into the garage, lay down heavier pieces, and remove ceramic planters entirely. If you have a screen enclosure over a pool deck, inspect the anchor points; a failed enclosure can drag fasteners across the pavers as it collapses.

What to Do Immediately After the Storm Passes

Once it is safe to be outside, clear debris from the paver surface as soon as possible. Wet leaves and organic matter left sitting in Florida humidity will stain pavers within days and feed mold and mildew growth in the joints. Use a leaf blower or soft broom rather than a pressure washer, which can drive remaining storm water deeper into compromised joints.

Then walk the surface again with the same checklist you used before the storm. Note any new low spots, shifted pavers, or sand loss. Small problems caught in the week after a hurricane are inexpensive to fix; the same problems ignored through the rest of the rainy season tend to spread.

Your Next Step Before the Next Named Storm

If you have not had a professional look at your hardscape in the last two years, schedule an inspection now rather than after a watch is issued. A qualified paver contractor can evaluate joint condition, sealer age, base stability, and drainage in a single visit, and most issues that show up on that report can be addressed in a few days of work. Going into peak season with a documented, repaired hardscape is the difference between sweeping up after a storm and rebuilding after one.

Before and after pool deck paver sealing by Paver Rescue LLC in Tampa, FL — restored color and clean finish

ARTICLE

Why Paver Sealer Fails Early on Brandon Pool Decks Every Summer

Brandon pool decks put paver sealer through a brutal stress test each summer. Here’s why coatings fail early and how to prevent it from happening again.

Every summer, the same call comes in from Brandon homeowners: the pool deck sealer that looked sharp in April is hazy, peeling, or blotchy by August. The pavers themselves are usually fine. The coating on top is the problem. Pool deck paver sealing in Florida is not the same job as sealing a shaded patio in a dry climate, and the failures we see in Brandon almost always trace back to a predictable combination of heat, water chemistry, and moisture trapped under the film.

The Brandon Heat Load Is Harsher Than It Looks

Brandon sits inland from Tampa Bay, which means pool decks here see less sea breeze and more radiant heat than a comparable deck in Clearwater or St. Petersburg. Surface temperatures on a light travertine or concrete paver can climb past 140°F in July, and darker pavers run hotter. Most solvent-based acrylic sealers begin to soften and re-emulsify well before that threshold.

When a sealer softens repeatedly under foot traffic, pool toys, and chair legs, the film loses cohesion. You see scuffing first, then a milky cast where the resin has lifted from the paver surface. By the time homeowners notice it, the coating is already compromised across the whole deck.

Pool Water Chemistry Attacks the Film

The second culprit is what gets splashed onto the deck every day. Chlorinated water, salt-system brine, and the calcium hypochlorite or cyanuric acid residues that dry on the pavers all interact with the sealer. Salt-system pools are particularly tough on coatings because evaporation leaves a fine crystalline layer that abrades the film and pulls moisture out of it.

A sealer rated for driveways is not automatically rated for pool decks. The product needs to tolerate repeated wet-dry cycling with treated water, not just rain. When the wrong product is specified, you often see the first failure right at the coping and the steps, where splash-out is constant.

Pre-Application Moisture Is the Silent Killer

The single most common reason sealer fails early on a Brandon pool deck is moisture trapped in the pavers when the sealer went down. Florida pavers are rarely as dry as they look. After a typical summer afternoon storm, the top surface dries in an hour, but the joint sand and the bottom of the paver can hold water for days. Pavers installed over a concrete slab dry even slower, because the slab itself stays damp.

When sealer is applied over a paver that is still releasing moisture, the vapor has to escape somewhere. It pushes up through the curing film and creates a hazy, white blush. Sometimes it bubbles. Sometimes it looks fine for two weeks and then clouds the first time the deck gets hot. This is the classic “why is my sealer turning white” problem, and it is almost always a moisture issue, not a product defect.

Efflorescence Adds a Second Layer of Trouble

Florida’s humidity and frequent rain pull mineral salts out of the concrete pavers and the setting bed below them. Those salts crystallize at or just under the surface as efflorescence. If a deck is sealed before that efflorescence is properly removed, the salts continue to migrate and push the film off the paver from underneath.

On a pool deck, this happens faster because the pavers are wet so often. A proper prep includes an efflorescence remover, a thorough rinse, and enough dry time afterward — usually longer than the product label suggests for our climate.

Rainy Season Timing Works Against You

Many homeowners schedule pool deck paver sealing in June or July because that is when the deck gets the most use. Unfortunately, that is also when Tampa Bay’s afternoon storms are most reliable. A sealer that needs 24 to 48 hours of dry weather to cure properly almost never gets it during the rainy season.

If the film is rained on before it has fully crosslinked, the water can leave permanent cloudiness or wash uncured resin into the joints, where it dries as a glossy, uneven crust. The better windows for sealing in Hillsborough County are typically late spring before the storm pattern sets in, or October and November once it breaks.

What a Durable Pool Deck Seal Job Actually Requires

A pool deck that holds its sealer through a Brandon summer is the result of three things done in order. First, the deck is cleaned, stripped of any failed coating, and treated for efflorescence, then given real dry time — often three to five days of sun, not just one. Second, joint sand is replaced and allowed to settle before any film goes down, so the sealer is not bridging damp sand. Third, a product matched to pool deck exposure is applied in thin, even coats during a stable weather window.

Cutting any of those steps is where early failure begins. A rushed prep on a damp deck during rainy season is the single most common pattern behind the August service calls we get from Brandon, Valrico, and Riverview.

Your Next Step Before the Next Season

If your pool deck sealer is already showing haze, peeling, or scuffing, the fix is not another coat on top. The existing film needs to be assessed and, in most cases, stripped before a new system can bond properly. Walk the deck in the morning while it is still cool, photograph the worst areas near the coping and steps, and note when the last sealing was done and what product was used. That information makes a professional evaluation much faster and gives you a realistic plan for resealing during the next good weather window, rather than in the middle of another wet, hot Florida summer.

Paver patio base preparation and installation in progress at a Florida home, with compacted gravel base and palm trees in background

ARTICLE

Planning a New Paver Patio in Land O Lakes: What June Buyers Should Know First

If you’re planning paver installation in Land O Lakes this June, drainage, soil prep, and wet-season timing matter more than the pavers themselves. Here’s what to address first.

June is a busy month for outdoor projects in Pasco County. Homeowners want a finished patio in time for summer cookouts, and contractors are booking out fast. But June is also the start of Florida’s rainy season, and that single fact changes how a new paver patio should be planned, scheduled, and built. Before you sign anything, it’s worth understanding the site-specific issues that decide whether your hardscape stays flat and clean for a decade—or starts shifting after the first tropical system.

Why Land O Lakes Soil Behaves Differently

Much of Land O Lakes sits on sandy, fast-draining soil with a relatively high water table. That sounds like good news for drainage, and in some ways it is. Water moves through the surface quickly. The catch is that loose sand also moves easily under load, especially when saturated. A paver patio that wasn’t properly compacted on a stable sub-base can develop low spots, rocking pavers, and joint separation within a year or two.

The other complication is clay pockets. Parts of Pasco County have unexpected layers of clay or organic muck a few feet down. If your installer doesn’t probe the site before excavation, you can end up with a base that drains beautifully on top but holds water underneath, leading to slow, uneven settlement.

What Proper Site Prep Actually Looks Like

For paver installation in Land O Lakes, the industry-standard base for a residential patio is roughly six inches of compacted crushed concrete or limerock over a stabilized sub-grade, topped with about an inch of bedding sand. On problem soils, that base may need to be eight inches or more, sometimes with geotextile fabric between the sub-grade and the base to prevent the two layers from mixing over time.

Compaction is done in lifts—two to three inches at a time—not in one pass over the full depth. If you watch a crew dump six inches of base material and run a plate compactor over it once, that’s a red flag. The interior of that layer will never reach the density it needs.

Drainage Planning for the Rainy Season

From June through September, Tampa Bay regularly sees afternoon downpours of two to four inches in an hour. Your patio needs to shed that water deliberately, not just hope for the best. A minimum slope of about one-eighth inch per foot away from the house is standard, and steeper is better on larger surfaces.

Pay attention to where the water goes after it leaves the patio. If runoff is directed at a flower bed, a fence line, or a neighbor’s property, you’ll create new problems. In Land O Lakes neighborhoods with retention ponds or swales, your installer should confirm that drainage paths still work with the new hardscape in place. For patios near pools or screened lanais, a French drain or channel drain along the perimeter is often worth the added cost.

Timing the Install Around Florida Weather

June installations are absolutely doable, but the schedule has to be realistic. Excavation and base work need at least a couple of consecutive dry days—saturated sub-grade can’t be compacted properly, and a crew that pushes through wet conditions is setting the project up to fail. Most reputable installers in Pasco will build a weather buffer into the timeline rather than promise a fixed end date in June or July.

If your project is tied to a specific event, plan backward from that date with at least a week of cushion. Polymeric sand joints, in particular, need a dry installation window to cure correctly. Putting them in ahead of a thunderstorm is one of the most common causes of early joint failure in Florida.

Material Choices That Hold Up to Humidity

Not every paver performs the same way in a humid climate. Dense, low-absorption concrete pavers resist efflorescence—the white haze caused by mineral salts migrating to the surface—better than cheaper, more porous options. Travertine remains popular around pool decks for its cool surface temperature, but it’s softer and stains more easily, so sealing becomes more important.

Color matters too. Very dark pavers absorb heat aggressively in Florida sun, which can make a barefoot patio uncomfortable from May through October. Mid-tone blends usually age more gracefully and hide the fine sand and pollen that settle on every outdoor surface in Tampa Bay.

Sealing: Plan for It, Don’t Add It Later

New pavers should typically cure for 60 to 90 days before their first seal. That means a June installation will be ready for sealing in late summer or early fall—ideal timing, since you’ll lock in the joint sand before the dry, windy months and protect the surface ahead of holiday entertaining.

Build the cost of that first seal into your project budget from the start. A quality sealer stabilizes joint sand, slows efflorescence, resists mildew, and makes routine cleaning far easier. Skipping it is the single fastest way to shorten the life of an otherwise well-built patio.

Your Next Step

Before you commit to a contractor, walk your yard with a tape measure and a notebook. Mark where water currently pools after a storm, where the sun hits hardest in the afternoon, and how far the patio needs to sit from the house, screen enclosure, or property line. Bring that information to your first consultation. A good installer will ask about all of it before quoting a number, and the conversation will tell you quickly whether they understand Pasco County conditions or are simply selling pavers. From there, you can plan a June start with confidence that the finished patio will still look right years from now.

Contractor using plate compactor to repair lifted pool deck pavers in Tampa Bay FL area

ARTICLE

What to Do When Pool Deck Pavers in Clearwater Start Lifting or Shifting

A practical guide for Clearwater homeowners on why pool deck pavers shift in coastal Florida conditions, when a spot repair works, and when a full re-set is the smarter call.

Pool deck pavers in Clearwater take more abuse than most homeowners realize. Salt-laden air, sandy subsoil, daily splash-out from the pool, and a rainy season that can dump several inches in an afternoon all conspire to loosen what was once a tight, level surface. When you start noticing edges that catch your toes or stones that rock underfoot, the question isn’t whether to act — it’s how far the fix needs to go.

Why Pool Deck Pavers Shift in Coastal Pinellas

Most pool decks west of the bay sit on a thin base of compacted screenings over native sandy soil. That base works well when it’s installed correctly and stays dry, but Pinellas County conditions are unusually tough on it. Wind-driven rain pushes water under coping stones, pool splash-out saturates the perimeter, and the high water table near the coast means the base never fully dries during the summer months.

Add in the freeze-thaw cycle’s tropical cousin — expansion and contraction from intense midday heat followed by sudden afternoon storms — and the joint sand starts to migrate. Once joints empty out, individual pavers lose lateral support and begin to rotate or sink under load.

Reading the Symptoms Correctly

Not every uneven paver signals a serious problem. A single high corner near a planter root, or a small dip where a heavy potted plant sat for years, is usually a localized issue. The repair is straightforward: lift, re-bed, re-sand.

Broader patterns tell a different story. If you see a low spot that runs across multiple pavers, edges of the deck pulling away from the pool coping, or stones that rock when you step on them in several areas, the base itself is failing. Hollow sounds when you tap suspect pavers with a rubber mallet usually confirm voids underneath.

When a Spot Repair Is Enough

Spot repairs make sense when the field of the deck is still tight and flat, and only a handful of pavers — typically fewer than ten or so in one zone — have shifted. A qualified paver repair contractor in Tampa Bay will lift the affected stones, inspect the base, add or recompact screenings to restore the correct elevation, reset the pavers, and lock everything back in with polymeric joint sand rated for wet environments.

Done properly, a spot repair on a Clearwater pool deck should last many years. The key is matching the base material, screeding to the surrounding grade, and using a joint sand that won’t wash out the next time a tropical system passes through.

When Re-Setting the Deck Is the Right Call

A full re-set — lifting every paver, reconditioning the base, and relaying the field — becomes the smarter investment when the failure is structural rather than cosmetic. Warning signs include settling along the entire pool edge, visible erosion channels where rain runs off the deck, repeated repairs in the same area, or a deck that has shifted enough to expose the bond beam of the pool.

Re-setting also gives you the opportunity to correct original installation mistakes that are common in older Pinellas homes: insufficient base depth, no geotextile fabric between the base and the native sand, or edge restraints that were never installed at the deck perimeter. Skipping those corrections and only chasing the visible symptoms tends to lead to the same problems within a season or two.

Salt Air, Efflorescence, and the Sealing Question

Coastal homeowners often ask whether sealing will prevent future shifting. Sealing alone won’t hold a failing base together, but it plays an important supporting role after the structural work is done. A breathable, penetrating sealer locks polymeric joint sand in place, slows the salt-air weathering that pits paver surfaces, and reduces the efflorescence haze that’s especially common on decks within a mile or two of the Gulf.

Timing matters. New polymeric sand needs to cure fully — usually a few weeks of dry weather — before sealing. In Clearwater, that often means scheduling the re-set in late fall or early winter, when the afternoon storms taper off and humidity drops enough for sealers to cure properly.

Choosing the Right Contractor for Coastal Work

Pool deck repair near the coast isn’t the same job as a driveway repair inland in Brandon or Wesley Chapel. The contractor you hire should be able to explain how they’ll handle the high water table, what edge restraint they’ll install along the pool coping, and which joint sand and sealer products they trust in salt-air conditions. Ask to see recent pool deck projects in Clearwater, Belleair, or Indian Rocks Beach, and ask how those decks have held up through the last two hurricane seasons.

Be cautious of bids that are dramatically lower than the rest. On a coastal pool deck, the cost difference almost always reflects shortcuts in base preparation or sand selection — the two areas where shortcuts will cost you the most over time.

Your Next Step

If you’ve noticed even one or two pavers starting to rock or lift around your Clearwater pool, walk the full deck this weekend with a rubber mallet and a level. Mark anything that sounds hollow, rocks under pressure, or sits more than a quarter-inch out of plane. Take photos of the pool coping line and any low spots that hold water after a rain. That short inventory will tell a qualified contractor whether you’re looking at a half-day spot repair or a full re-set, and it will keep the conversation focused on the actual condition of your deck rather than guesswork.

Before and after paver sealing on a Florida pool deck, showing restored color and protection in Tampa Bay's humid climate.

ARTICLE

How Humidity Affects Paver Sealer Cure Time in Hillsborough County

High summer humidity in Hillsborough County can ruin a paver sealer application. Here’s the science behind cure time and what a qualified contractor does differently.

If you’ve ever watched a freshly sealed driveway turn cloudy, blotchy, or sticky a few days after the crew packed up, you’ve seen what humidity can do to a paver sealer. In Hillsborough County, where June dew points routinely sit in the low 70s and afternoon storms are a near-daily event, sealer cure time is one of the most underestimated variables in the entire job. Understanding it is the difference between a finish that lasts five years and one that fails before the next holiday weekend.

What “Cure Time” Actually Means

Cure time is not the same as dry time. A sealer can feel dry to the touch within an hour, but full chemical curing — the stage where solvents or water carriers fully evaporate and the resin locks into a hard, protective film — can take anywhere from 24 hours to several days. During that window, the coating is still vulnerable to moisture, foot traffic, and temperature swings.

For most solvent-based acrylic sealers used on Florida pavers, manufacturers specify a relative humidity ceiling, often 75 to 80 percent, and an ambient temperature range between roughly 50 and 90 degrees. In a Tampa Bay June, both numbers are routinely violated by mid-morning.

Why Florida Humidity Is a Sealer’s Worst Enemy

Acrylic sealers cure as their carrier evaporates into the surrounding air. When the air is already saturated with moisture, evaporation slows dramatically. The solvent gets trapped beneath a partially formed film, and the sealer can blush — that milky, white haze homeowners in Brandon and Riverview often call us about after a rushed application.

Worse, trapped moisture rising from below the pavers (a process driven by Florida’s high water table and frequent rain) pushes through the curing film. The result can be efflorescence bleeding through the sealer, delamination, or a tacky surface that traps dirt and grass clippings for months.

The June Problem in Hillsborough County

June kicks off Florida’s rainy season. In neighborhoods from Carrollwood to Apollo Beach, morning humidity often starts above 85 percent and barely dips below 70 percent before the afternoon thunderstorms roll in around three or four o’clock. That gives a contractor a narrow, unpredictable application window — sometimes only a few hours — to apply a product that may need 24 dry hours to cure properly.

A crew working on a fixed schedule, without watching radar or measuring moisture, will often seal anyway. The homeowner pays for the job, the surface looks fine for 48 hours, and then the first heavy rain reveals the damage.

How a Qualified Contractor Adjusts

Experienced paver sealing crews in Tampa Bay treat the weather forecast as part of the job estimate. Before any sealer hits the surface, a qualified contractor will check the radar for at least a 24-hour clear window, measure surface moisture with a meter (pavers can hold water for days after a storm even when they look dry), and confirm that ambient humidity falls within the manufacturer’s specification.

They’ll also choose the right product for the conditions. Water-based sealers, for example, tolerate higher humidity than solvent-based acrylics but require different surface prep. Some contractors in Pasco and Pinellas counties shift their schedules to start jobs at sunrise, when humidity is highest but rain risk is lowest, then stop application well before the afternoon storm cells build.

Surface Prep Is Half the Cure

Even a perfect weather window won’t save a job that skips proper preparation. Pavers that were pressure-washed the same morning still hold significant moisture in their pores. That water has to migrate out before sealer goes down, otherwise it gets trapped beneath the film.

On a typical Lutz or Wesley Chapel driveway, that means cleaning one day, allowing 24 to 48 hours of drying time, then sealing only after a moisture meter confirms the pavers are ready. Joint sand stabilization, repairs to sunken pavers, and treatment of any efflorescence all happen before the sealer is opened.

What Failure Looks Like — and Why It’s Expensive

A sealer that fails to cure properly cannot simply be recoated. The compromised film usually has to be stripped chemically, which is labor-intensive, hard on surrounding landscaping, and often costs more than the original sealing job. Homeowners who chose the lowest bid in June frequently end up paying twice by September.

The visual signs of a bad cure include white blush or haze, sticky or tacky spots that collect debris, peeling at paver edges, and a dull, uneven sheen. If you see any of these within a week of application, the cure failed.

Your Next Step

If you’re planning paver sealing in Tampa this summer, ask any contractor you interview three specific questions: What humidity and temperature range does your sealer require, how do you verify paver moisture content before application, and what’s your policy if rain hits within 24 hours of the job. The answers will tell you immediately whether you’re hiring a crew that respects Florida’s climate or one that’s about to sell you a problem. A short conversation now is far cheaper than a strip-and-reseal next fall.